_!_https://captureguide.b-cdn.net/wp-content/uploads/2019/02/smooth-q-unboxing.jpg_!_
Smartphone cameras have been getting better and better, with the likes of the
iPhone X line and the Samsung S9/S9+ delivering fantastic 4K recordings at a
smooth 30 fps. It’s no wonder then that more and more phone users are
beginning to take photography and filmmaking with their phones more seriously.
The Zhiyun Smooth Q is a feature packed 3-axis gimbal that is now available
for under $90. The mere fact that it’s a 3-axis motorized gimbals means it
will provide far better stabilization than any EIS or OIS that is built into
any smartphone.
A sub-$90 3-axis gimbal simply didn’t exist a couple of years ago and will no
doubt be very tempting for a whole new generation of smartphone
cinematographers.
Zhiyun are a big name with a good track record when it comes to their gimbals.
Despite being a budget gimbal, I definitely have high hopes for the Smooth Q.
Let’s see how their new ‘consumer grade’ gimbal, the Smooth Q, turned out this
review.
First Impressions
Inside the Smooth Q’s box are a charger, Micro USB cable, user manual and
finally the gimbal itself. The gimbal is packed in a silver, semi-hard case
that almost looks like a scaled-down electric guitar case.
The plastic build quality of the Smooth Q means it won’t really handle a
beating, but it does contribute to its lightweight 440g construction. The hand
grip does not feature a rubberized grip, and thus feels a little less
comfortable in the hands than some other smartphone gimbals like the DJI Osmo
Mobile.
Mounting smartphones is easy and simply a matter of sliding your camera in and
making sure it sits tightly.
Powering the gimbal on by holding down the button for two seconds will
automatically make the Smooth Q calibrate and balance the mounted phone into a
leveled position. For a entry level smartphone, I was impressed that the
motors were powerful enough to balance larger phones like my iPhone 8 Plus
without any problems.
Compatibility
With a max supported load of 200g, the Smooth Q supports most smartphones
around. However, phablet sized phones like the iPhone XS Max Galaxy Note 9
which weigh above 200g will run into issues.
The Smooth Q can also be used with GoPros or action cameras if a suitable case
adapter (purchased separately) is used.
Zhiyun Smooth Q Features
The Smooth Q’s built-in battery has outstanding battery life. With a 26650mAh
capacity, it lasts around 12 hours from a full charge which takes
approximately 3 hours. The Smooth Q also doubles up as a 5V, 2000mA
powerbank, which makes a lot of sense given its battery is so good.
On the hand grip you’ll find a digital zoom slider that means you don’t have
to pinch in and out on your phone’s display. Unfortunately, this feature is
only usable if you’re recording through Zhiyun’s ZY Play App, and the zooming
in isn’t particularly smooth.
Another impressive feature of the Smooth Q is its range of motion. Fully
capable of panning 360-degrees, the Smooth Q is good for taking those wide
panoramic shots. Moreover, you can easily switch between landscape and
portrait shooting modes, the latter becoming more and more important as the
likes of Instagram now enforce portrait videos.
Controlling the Zhiyun Smooth Q
The Zhiyun Smooth Q has a fairly basic control setup. By default, the gimbal
starts in pan follow mode, which keeps the horizon level but
follows any movements you make in the pan axis.
The follow mode is activated by clicking the mode button
twice. This is the same as the pan follow mode, except it will also follow
movements in the tilt (up and down) axis.
Finally, there is the locked mode. This mode will keep the
camera’s orientation locked, and the camera will stay focused on what you’re
pointing it at.
Like most other smartphone gimbals, the Smooth Q also features a joystick that
allows you to electronically adjust the pan and tilt. Personally I never use
the joystick as using my hands is both smoother and feels more natural.
Stabilization Performance
Zhiyun have claimed to feature a much improved stabilization system over
previous Smooth gimbals which makes it more responsive.
I haven’t used any of the older Zhiyun smartphones gimbals so cannot make a
direct comparison, but the Smooth Q’s motors definitely felt snappy. There was
no significant lag produced by the Smooth Q when making quick changes of
direction.
The motor noise was roughly the same as the DJI Osmo Mobile, making it neither
loud nor especially quiet.
Overall stabilization was very reliable from the Smooth Q. However, keep in
mind the gimbal’s motors can only support a weight of up to 200g. Those with
heavier phones might want to consider gimbals which aren’t cutting things so
close.
Zhiyun ZY Play App
Zhiyun’s companion app is fairly basic. Its latest update lets you record 4K
video from the app on Android as well as iPhone. However, it lacks some of the
custom settings you ideally want in a video recording app.
That’s why I’d recommend using a stock iPhone/Android camera apps or a
third-party one. iPhone users may want to check out popular third party
options since you cannot disable OIS (which can interfere with the gimbal’s
stabilization) in the stock iOS camera app.
However, it does the job for updating the gimbal’s firmware, adjusting follow
speeds and configuring other settings.
Conclusion
Currently priced below $90, the Zhiyun Smooth Q is a great budget smartphone
gimbal. The long battery life is perhaps its best feature, but it is certainly
no slouch in other regards. Its build quality feels somewhat cheap, but it
looks able to withstand casual use.
Pros
One of the cheapest options for a smartphone gimbal
Decent image stabilization and quiet motors
Cons
Doesn’t play well with heavier phones
Poor build quality
Rating: 4/5
Sale
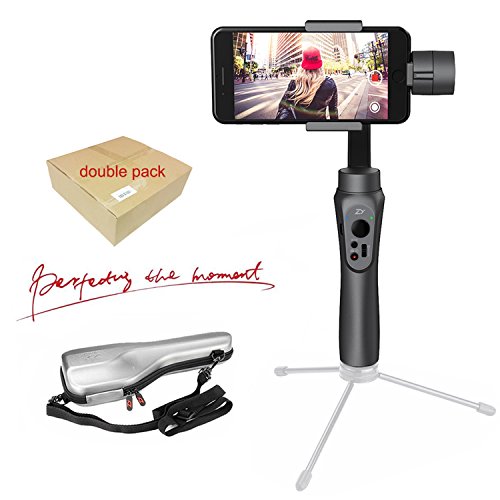
Zhiyun Smooth Q 3 Axis Smartphone Gimbal
Zhiyun Smooth-Q 3-Axis gimbal stabilizer suitable for smartphones
up to 7.7 oz like fits iPhone 7 plus, Samsung S7 and Gopro Hero
4/5, etc. gives you the best affordable solution for shooting
videos,(Gopro Adapter not included, but sell in our store with
lowest price! Please don't add a phone case while using the
gimbal)
One Year limited warranty is provided.Smooth, Steady and Noiseless
Videos powered by 3 brushless motors, 3 axis up to 360 degrees
unlimited rotation.Allow easy switch of mounting direction, either
horizontal or vertical. Control the shooting angle by touching
sensitive 4-way joystick.
Zhiyun Smooth Q is designed with the 5th High-Precision
Stablilizing Algorithm System. 30%-40% Faster Response Rate
Compared with Smooth II, More Accurate and Quicker Response.Zhiyun
Smooth-Q give you a best affordable solution that basically give
you all you need for a 3 Axis Smartphone Gimbal.
Enhanced camera functions such as camera record, zoom in/out, face
tracking, panorama mode and time-lapse mode can be achieved via
APP "ZY Play" available for Android and IOS.the Smooth-Q makes
your shooting more creative and enjoyable.
A standard micro-USB charging port and built-in batteries support
12hrs operating time. Another USB port enables to recharge mobile
while shooting.
The skateboarding itself is pretty cool, but what sticks out most is just how stable the footage is. As it turns out, the secret isn’t some kind of black magic, but rather a pretty neat accessory known as a “gimbal” stabilizer.
A gimbal is a tool that uses motors and intelligent sensors to support and stabilize a camera – meaning you can film silky smooth video footage while on the move.
A handheld gimbal for a GoPro.
How Does A Gimbal Work
In Hollywood, film producers in the past typically employed very expensive Dollys or Steadicams that use physical moving parts to keep things steady. These tools aren’t computer assisted, so they require the operator to be highly skilled in using them.
Professional film studios use incredibly expensive equipment to keep footage steady. Yikes!
Gimbals, on the other hand, are a more recent ‘digital’ kind of miniature stabilizer. They have their very own little brain and use sophisticated motion detecting abilities to essentially differentiate between the videographer’s intentional movements and unwanted camera shake.
Let’s consider your phone for a minute. It most likely has accelerometers and gyroscopes built-in which enables it to sense when you’ve flipped the screen or lifted it off the table.
A gimbal also has all that sensing capability PLUS some moving pivots and a camera mount. By utilizing quiet (obviously you don’t want the sound of motors being picked up by the mic!) brushless motors that make micro-adjustments to the arms, the mounted camera can be completely steady — just like when you lift up and move a chicken around
A Closer Look At The Science Behind Gimbals
I’m not going to pretend to be an expert on the physics that goes into a gimbal, but I can at least give you the lowdown.
Any physical object can rotate in 3 dimensions: pitch, yaw and roll. If you’re familiar with adjusting camera tripods, you’ll probably have experience making adjustments in all three axes to get that perfectly lined up shot.
The Three Axes of rotation: Pitch (a.k.a Tilt), Yaw (a.k.a. Pan) and Roll
A shaking camera will obviously have random unwanted movement in all 3 axes. However, it is possible to effectively counteract those movements by producing movements in the opposite direction. Essentially, we do the exact opposite pitch, yaw and roll movements and voila, we have a perfectly stable camera.
This isn’t rocket science, but how can we actually produce those exact countermovements? Modern day technology, of course.
In a motorized gimbal, ‘inertial measurement units’ or IMUs (a fancy way of saying motion and rotation sensors) immediately send movement data to a computer which in turn calculates how much countermovement is needed in each axis.
Of course, sometimes the cameraperson will deliberately tilt the camera. The computer therefore uses advanced heuristic algorithms that can tell when the movement was deliberate or not. Pretty neat, right?
In the context of photography/videography, the axes are more commonly referred to as Tilt, Roll and Pan.
2-Axis and 3-Axis Gimbals
Most gimbals will either be 2-axis or 3-axis gimbals. You can probably guess that a 3-axis is superior. However a 3-axis gimbal is more expensive, and the difference the extra pivot makes might not be enough to warrant the extra cost.
A two axis gimbal corrects a camera that is pitching forward and back or rolling from side to side. It won’t correct unwanted movements in the yaw axis. A three axis gimbal, on the other hand, does correct unwanted shake in the yaw axis, resulting in even more stable footage.
When you’re recording videos, it’s likely that you yourself will have some ability to reduce camera shake, especially in one axis. So A 2-axis gimbal is perfectly adequate for a lot of purposes.
A 3-axis gimbal has its own downsides. It has an extra pivot, meaning it weighs more. This is an especially big downside if you want to use it with a camera drone, where a heavier load can reduce the drone’s flight time. A 3-axis gimbal also has an extra motor. The extra motor means more battery consumption by the gimbal, and hence a shorter battery life.
How To Stabilize Video Using A Gimbal
Using a gimbal is very easy. Once setup, it does all the hard work of stabilizing for you, so the difficult part is finding something interesting to film.
Once attached to your camera, the gimbal will handle all the stabilization for you. Easy Peasy!
However, in the beginning at least, there will be some complications. Firstly, you need to choose the right gimbal for your camera.
If you’re using a GoPro or iPhone, a small handheld gimbal can be used. iPhone gimbals can typically also house GoPros thanks to their adjustable clamps, although a GoPro gimbal will have more direct compatibility. I’ve done extensive testing and made lists of what I rate to be the best gimbals for iPhones and best gimbals for GoPros.
If you’re wanting to use a gimbal with your DSLR or video camera on the other hand, you’re going to need a much bigger one. These bigger gimbals will of course also cost a lot more. Here is my list of the best gimbals for DSLR.
Once you’ve got your gimbal, you’ll follow the instructions to attach your GoPro/phone/DSLR/video camera to it and you’re pretty much set. Just be aware that the gimbal is designed only to cancel out those really small movements, and not bigger ones. For example, if you’re climbing the stairs, the entire camera will be moving up and down. If you don’t want that, you will still need to purposefully keep the camera moving upwards in a smooth line.
Gimbals Vs Mechanical Stabilizers
Hollywood has been producing amazingly stable footage for years, yet they didn’t rely on any of this new gimbal technology. Instead, they have been using fancy mechanical stabilizers called Steadicams. These beasts utilize a bunch of large counterweights, small counterweights, nuts, bolts, springs and more to mechanically counteract camera shake.
Hollywood/TV video recording equipment is simply too large for motorized gimbals to be feasible.
Gimbals are a newer phenomenon and technically only feasible because of the small nature of GoPros, iPhones, drone cameras and DSLRs. They are technically more advanced than mechanical stabilizers, but professional film studios use camera equipment that is too large for electronic motors to handle.
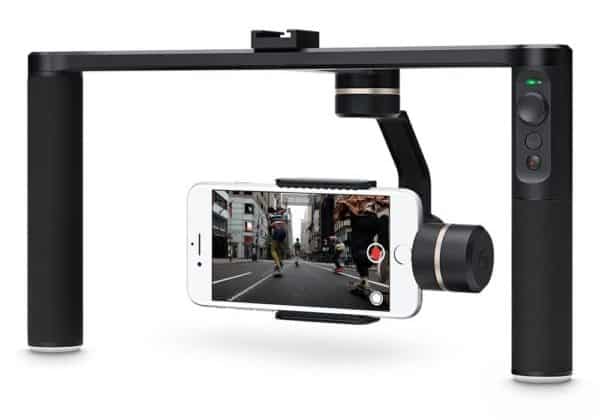
Some gimbals feature two handles that make it easier to hold steady
Most GoPro, iPhone and DSLR users will want to use gimbals for video stabilization. Many videographers WISH they could have a motorized gimbal for their huge video cameras, but they simply don’t.
However, it’s worth noting that mechanical stabilizers do exist for GoPros, phones and DSLRs. These are cheaper than motorized Gimbals but aren’t as effective and demand the cameraperson to use them skillfully. These were used by amateur videographers before motorized gimbals were a thing, but they don’t really have a reason to exist anymore (other than not requiring a battery).
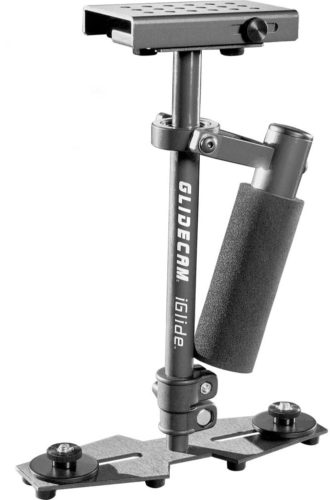
A company known as Glidecam were industry leaders in small-camera stabilization before gimbals were a thing, but there is no doubt that motorized gimbals are where the smartphone/action camera industry is heading.
The iGlide by Glidecam is a cheaper, mechanical alternative to motorized GoPro/iPhone Gimbals.
Amazing Camera Stabilization Is Now For Everyone
Gimbals have brought state-of-the-art camera stabilization to the masses. Just look at @fatmanthedog’s amazing videos on Instagram. Anyone with an iPhone, Android, GoPro can now take amazing action camera footage without any hassle.
Despite being a photographer that used to rarely shoot video, I have fallen in love with Gimbals and shooting video. It’s a cheaper hobby than photography and just plain fun. Whether you’re filming whilst travelling, skateboarding, skiing or whatever—doing it with a Gimbal is far superior to the built-in stabilization your phone or action camera has.
_!_https://captureguide.b-cdn.net/wp-content/uploads/2019/02/smooth-q-unboxing.jpg_!_
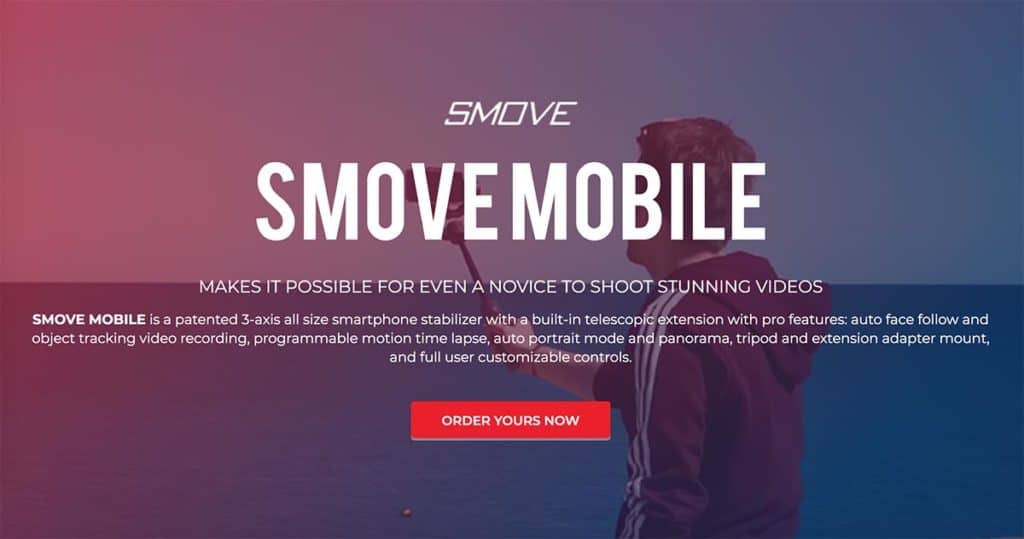
A few readers asked me to review the Smove Mobile which is a 3-axis smartphone gimbal being heavily marketed across Instagram and other social media streams.
For those of you who are unfamiliar with gimbals, they are basically a device you mount your phone on to drastically reduce camera shake and make the recording a lot more smooth. Or in this case, smove.
Upon checking out their website, it was immediately obvious that Smove’s marketing was far superior to that of all the Chinese gimbal manufacturers out there. No lousy spelling mistakes, boring technical specs and uninspired marketing imagery. Instead, we get a nice and catchy name and cool kids vlogging with the gimbal.
While the company’s marketing is on point, what about the gimbal itself? I recently did a write up for what I consider to be the best iPhone gimbals for this year, so what about the Smove? Let’s take a closer look in this review.
Compatibility
The Smove Mobile can accommodate phones with a width of anywhere between 57-84mm. Size wise, that covers every iPhone and almost every Android out there.
The maximum payload is 210g. For reference, the Samsung Galaxy Note 9 weighs 201g and the iPhone XS Max weighs 208g. Therefore, on paper at least, the vast majority of phones can be mounted on to the Smove.
However, the reality with pretty much any gimbal you buy is that the max payload is somewhat exaggerated. Mounting a heavier phone like the iPhone XS Max will put far more stress on the gimbal’s motors and drain the battery faster. Not only that, the gimbal will also struggle to stabilize.
Therefore, I always recommend going for a gimbal that has a max payload that leaves some room to spare. My current favorite gimbal, the DJI Osmo Mobile 2, for example, has a maximum payload of 240g. If you have a phone weighing over 200g, I wouldn’t recommend the Smove Mobile.
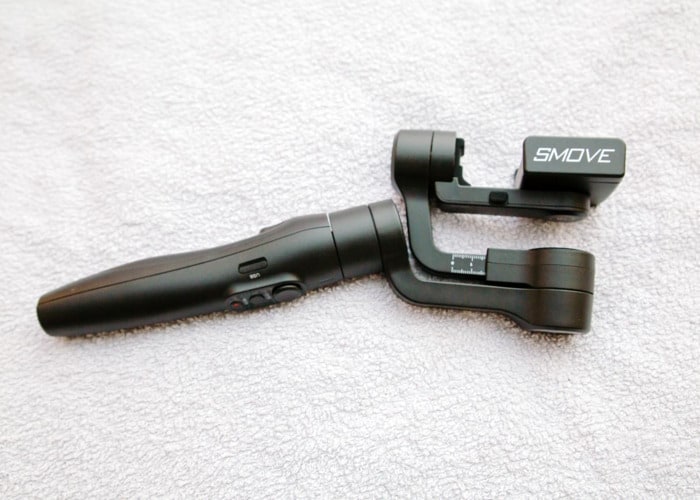
Build Quality
The Smove Mobile is built from plastic like most smartphone gimbals. However, it doesn’t feel as high quality as the DJI Osmo Mobile 2 or Zhiyun Smooth 4.
Weighing 428g, it is significantly lighter than the Osmo Mobile 2 (485g) and Smooth 4 (547g), despite housing a built in selfie stick.
Being lightweight can be seen as a plus, but at the same time there is no denying this gimbal doesn’t feel quite as robust as some of the others. Costing $159, the Smove Mobile doesn’t have the premium build quality one would hope for.
Features
One of the nice things about the Smove Mobile is that it’s got some unique features compared to other gimbals.
The most obvious one is the built-in, 7-inch extendable arm. This makes those all-important selfie-shots far more convenient and opens up new possibilities for various crane shots and underslung shots. While I personally don’t feel like an extendable arm is a must have feature, I can certainly picture some people finding it incredibly valuable.
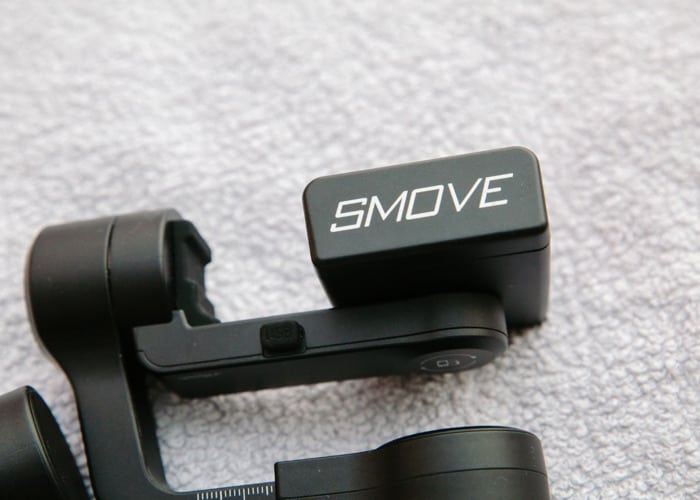
Another feature I like is the fact there is a USB charging port located on the cradle (or phone mount) itself. While almost all smartphone gimbals double up as a powerbank, a lot of them only feature a charging port on the grip, which isn’t quite as tidy as having a short cable connect your phone to the charging port right beside it.
Using the Smove Mobile
Mounting your phone to the Smove Mobile is simple, and it features one of the simplest mounting mechanisms out there. Simply slip your phone into the spring loaded clamp and make sure it is fully secured and balanced properly.
The gimbal has three main shooting modes: pan, follow and locked.
Pan: the gimbal will follow panning movements but keep the roll and tilt axes locked.
Follow: the gimbal will follow all up/down and left/right movements but keep the roll axis locked.
Locked: the gimbal will keep its orientation fixed.
These are pretty much the standard shooting modes you’d expect a smartphone gimbal to have. 90% of the time, your experience with the gimbal will be spent using one of these modes and let the gimbal work its video-smoothing magic.
There are some extra tricks you can employ when filming, like pulling the trigger at the back of the grip to temporarily lock the pan and tilt axes or using the joystick to electronically pan and tilt with more precision.
The Smove Mobile also features some other modes like motion timelapses and face/object tracking. I don’t find myself using these so won’t comment on these any further.
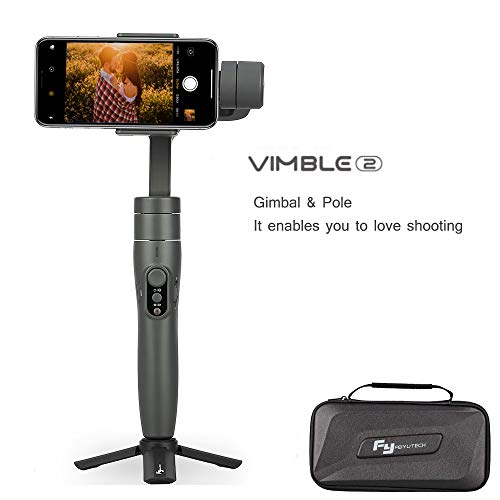
A Rebadged FeiyuTech Vimble 2?
I didn’t want to reveal this right from the get go but as soon as I got my hands on the Smove Mobile it was obvious that the gimbal is just a rebadged FeiyuTech Vimble 2. The Smove Mobile even has Feiyu Tech branding on it at the back of the mount.
I have previously reviewed the Vimble 2 and gave it a score of 8/10. It is a decent gimbal for the price and the extendable arm is a unique selling point.
The Smove Mobile costs roughly $70 more despite being the exact same gimbal with a different name stuck on it. What’s more, Smove don’t even bundle the mini tripod in the box, and instead sell it separately as a separate accessory!
Private labeling products is nothing new and there’s nothing wrong with the practice. And we’ve already seen it before with Evo Gimbals rebadging Zhiyun gimbals as their own. But with the Smove Mobile, the $70 markup for a bundle that contains less than the original FeiyuTech Vimble 2 bundle seems excessive to say the least.
Verdict
Pros
7 inch extendable arm allows for more creative freedom
Good stabilization performance
Cons
Struggles with heavier phones
An expensive FeiyuTech Vimble 2
The Smove Mobile itself is not a bad gimbal. But it doesn’t present good value for money. It is exactly the same gimbal as the FeiyuTech Vimble 2 which costs just $90 at the time of writing. With no improvements in hardware or software, it is simply too difficult to justify the additional cost.
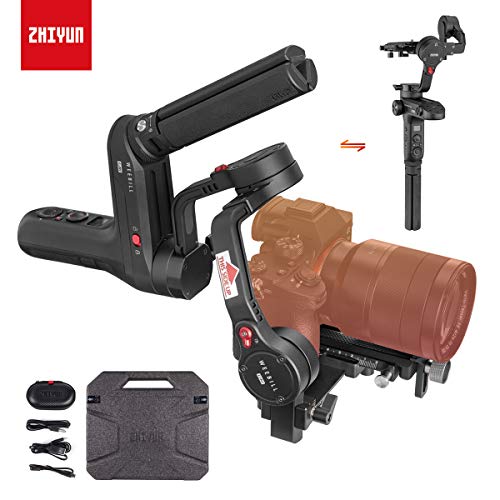
Zhiyun used to dominate the under $1000 singled-handed gimbal market. That was until DJI answered with the Ronin-S which I found to be overall a better gimbal than the hugely successful Zhiyun Crane 2. This year, Zhiyun released the Crane 3 LAB and Weebill LAB in an attempt to regain the single-handed DSLR/Mirrorless camera gimbal crown.
In this article we’re going to compare the Zhiyun Weebill LAB with the DJI Ronin-S which I ranked as the best gimbal for DSLR. While the Crane 3 LAB is definitely worth considering, there is no doubt the Weebill LAB has made bigger shockwaves thanks to its lower price point and compact, travel-friendly size.
Sale
DJI Ronin-S
Easy to hold in one hand so you can focus better on your subject with the easy-to-control focus wheel.
Create professional and smooth videos and camera shots with the ronin-s stabilizer when you are on the move.
Smoothtrack technology allows you to transfer from motion to camera angle with one hand. Switch between three user profiles with a simple click.
Compatible with most DSLR and mirrorless cameras including Sony A7 series, Canon 5D/6D/7D/60D/70D/80D series, Nikon D5/3/850/750/700/5000 series/7000 series, Panasonic GH5/GH5s and more.
In the box: Ronin -S gimbal, BG37 grip (built-in battery), camera mounting plate, focus wheel, RSS IR control cable, multi-camera control cable (Type-C & type-B), lens support, camera Riser, extended grip/ tripod, USB-C cable, power adapter, Accessories box, Allen wrench, storage Case
Sale
Zhiyun Weebill LAB Standard Package
Stabilization Performance
Most DSLR and mirrorless camera gimbals coming from Zhiyun and DJI have offered top-notch stabilization for a while now and the Ronin-S and Weebill LAB are no different. Although the general consensus is that the Ronin-S has slightly superior stabilization, the difference is hardly big enough to make this the ultimate deciding factor.
Winner: DJI Ronin-S
Build Quality
The Ronin-S is the clear winner here. It’s a heavy piece of equipment that feels incredibly robust next to the Weebill LAB. The Zhiyun Weebill LAB has more plastic than the older Crane 2, which already felt less hard-wearing than the Ronin-S. Winner: DJI Ronin-S
Weight and Portability
The trade off of robustness is of course weight, and the Weebill LAB weighs 2.5lbs (1.12 kg) whereas the Ronin-S weights 4.1 lbs (1.86 kg). Not only is the Weebill LAB much lighter, its form factor is also much more portable. Running around filming with a Ronin-S will feel a lot more cumbersome than the Weebill LAB.
In defence of the Ronin-S, it does pack down quite nicely thanks to the ability to unscrew the handgrip from the gimbal head. However, there is no questioning that for travelling, the Weebill LAB is superior. Winner: Zhiyun Weebill LAB
Ergonomics
The ergonomics of the Weebill LAB aren’t great. Its compact design is a blessing and a curse. The handle is short and the buttons and dials are packed closely together. However, one of the unique features of the Weebill LAB is the ability to attach a mini tripod to two different parts of the gimbal. This actually makes it possible to hold the gimbal in a variety of ways using two hands, and actually makes for a rather pleasant filming experience.
The Ronin-S features great ergonomics, with a longer, comfier grip and superior button placement. However, the focus wheel is rather awkwardly placed. Winner: DJI Ronin-S
Payload
The Zhiyun Weebill LAB can support a maximum payload of 6.6 lbs (3 kg) vs the Ronin-S’s 8 lbs (3.6 kg). The difference is quite significant, especially if you’re intending to use heavier cine lenses.
For DSLRs, the Ronin-S is definitely recommended over the Weebill LAB, which is fundamentally designed with mirrorless setups in mind. Although Zhiyun does list compatibility with DSLRs, the smaller motors and small form factor of the Weebill LAB just aren’t cut out for the size and weight of DSLRs. Even a mirrorless Sony A7III paired with a Sony 16-35mm f4 lens is pushing it, so you can begin to imagine how it would fair with heavier cameras.
Even if your payload doesn’t exceed 6.6 lbs (3 kg), the Weebill LAB can also potentially run into problems if you try and use longer lenses. This isn’t an issue to do with the camera and lens being too heavy. Rather, the weight distribution is ‘front-heavy’. This requires the camera to be placed all the way back on the mounting plate to be balanced, causing it to hit the back motor when putting it into underslung mode. Winner: DJI Ronin-S
Compatibility
Both the Ronin-S and Weebill LAB have full interfacing with Panasonic and Sony mirrorless cameras. The Ronin-S has superior compatibility with a number of Canon and Nikon DSLR cameras. Meanwhile, the Weebill LAB features compatibility with a broader range of mirrorless cameras like the Fujifilm X-series. There is always the chance that further compatibility gets added in subsequent firmware updates.
Compatibility list for DJI Ronin-S
Compatibility list for Zhiyun Weebill LAB
Winner: TIE
Battery Life
The DJI Ronin-S makes use of an in-built battery that can last up to 12 hours. One of the nice things about the in-built battery is that it can be charged while the gimbal is in operation.
Zhiyun state the Weebill LAB’s two removable batteries can provide a battery life of 10 hours. However, most users have found this to be quite an exaggeration, and you can realistically expect something between 4-7 hours depending on things like the weight of your setup and intensity of operation.
The batteries are removable, which means you have the option to carry around spares. However, unlike the Ronin-S, the Zhiyun Weebill Lab does not support direct charging. Winner: DJI Ronin-S
Verdict: DRAW
On paper, the Ronin-S is the clear winner. It beats the Weebill LAB in most areas and that is perhaps what you’d expect from a more expensive gimbal.
However, drawing a direct comparison to the two gimbals is unfair to the Weebill LAB, which is not only cheaper, but was intended for a different purpose. The gimbal is a lot smaller than the Ronin-S, and if you own a mirrorless camera with a prime lens it’s just a much nicer gimbal to take out and start filming.
Being used to the feel of my Nikon D850 DSLR, I personally rarely use my mirrorless cameras, so the Weebill LAB isn’t really for me. But I know for sure that if I used a mirrorless camera, the Weebill LAB would be the gimbal I’d actually chuck in the bag and find myself using most of the time.
DJI and Zhiyun are the two titans when it comes to the gimbal market for DSLR and mirrorless cameras. The DJI Ronin S and Zhiyun Crane 2 are two of the most popular single-handed gimbals for mirrorless cameras and smaller-bodied DSLRs.
The Ronin-S was DJI’s answer to the huge success of the Zhiyun Crane 2. Coming out around a year after the Crane 2, it finally meant DJI had something for those who were looking for a smaller and more affordable gimbal than the Ronin-M.
After recently renting out the Ronin-S for two days, I’ve had the chance to test the two gimbals side by side.
Stabilization and Tracking Performance
After fairly extensive testing of the two gimbals along with my Nikon D850, the two gimbals were pretty much even in stabilization performance. On certain playbacks the Ronin-S footage looked smoother, and in others the Crane 2 looked better. In any case, the difference wasn’t big enough for the naked eye to discern.
However, AI tracking performance was noticeably more snappy on the Ronin-S. The Crane 2 wasn’t bad by any means, but when filming my dog play fetch there were times where the Crane 2 would take time to catch up and end up with the dog missing from a few frames. Winner: DJI Ronin-S
Maximum Payload
The Zhiyun Crane 2 can carry a payload of up to ~7lbs (3200g). The Ronin-S can support up to ~8lbs (3600g).
Both gimbals should be fine for most DSLR setups, but the Ronin-S leaves more breathing room for those that employ heavier cine lenses, shotgun mics, gimbal monitors and various other accessories. Winner: DJI Ronin-S
Build Quality And Ergonomics
Both the Crane 2 and Ronin-S are built from durable metal, but the heavier Ronin-S definitely feels more robust in the hands. In saying that, there haven’t been any widespread build quality issues for the Crane 2 or Ronin-S, so it’s safe to say that it’s unlikely either gimbal will fall apart while filming.
Both gimbals have good ergonomics but the Ronin-S has a slightly more ergonomic grip. The Ronin-S has an ergonomically designed grip whereas the Crane 2 just has a metal cylinder as its grip, which can make it difficult to determine whether you are holding it completely straight since it feels the same all around. Winner: DJI Ronin-S
Weight and Portability
Weight and portability are two crucial factors for those that frequently hit the road and film for longer periods of time.
The Ronin-S weighs 4.1 lbs (1.86 kg) whereas the Crane 2 weighs 2.76 lbs (1.25 kg). The difference isn’t huge and the weight of the gimbal itself only accounts for a small proportion of the entire setup’s weight. However, over long periods of time the weight you save with the Crane 2 will definitely reduce fatigue.
Although the Crane 2 weighs less, it doesn’t pack down quite as well as the Ronin-S. DJI have made it possible to unscrew the base/grip from the gimbal head, making it easier to fit into smaller compartments. Winner: Tie
Camera Compatibility
Although both gimbals will be able to stabilize footage for any camera that fits properly, proper compatibility ensures that the gimbal can properly control various camera features.
The Ronin-S originally lacked compatibility for Canon DSLRs, but with the latest firmware full interfacing compatibility has been added. Meanwhile, Zhiyun added compatibility with the Nikon Z6 and Z7 in their latest firmware updated.
Full Ronin-S compatibility list
Full Crane 2 compatibility list
Winner: Tie
Accessories
There are a plethora of accessories for either gimbal. DJI and Zhiyun are the biggest names in DSLR/mirrorless gimbals and have a lot of first-party and third-party accessories.
A follow focus system which physically pulls the focus ring on the barrel of a lens is an accessory often used by those filming video. Upon its release the Ronin-S lacked a follow focus system but now DJI have released their own. The Zhiyun Crane 2 has the Servo Follow Focus accessory. I have personally not used either and have gotten satisfactory results with autofocus, but more technical videographers will certainly want to look deeper into the gimbals’ respective follow focus system options. Winner: Tie
Battery Life
The Crane 2 makes use of three removable batteries that together give it an 18 hour battery life. Meanwhile, the Ronin-S features a built-in battery which can last for up to 12 hours.
Removable batteries are superior in that they can be recharged separately and provide the option for buying a secondary set of backup batteries. The built in battery of the Ronin-S does however mean charging is without the need of taking out the batteries and putting them back in each time you charge. Winner: Zhiyun Crane 2
Price
At the time of writing, the Crane 2 is the cheaper of the two. You can get the gimbal with the servo follow focus unit for just shy of $500.
Meanwhile, the cheapest option for the Ronin-S is the Essentials Kit which includes a plastic (instead of metal) tripod and doesn’t bundle a follow focus unit. The official bundle costs more. Winner: Zhiyun Crane 2
Verdict
After spending time with both gimbals I can say I preferred the DJI Ronin-S overall. Its ergonomics were superior and I would have more trust in its reliability given the superior build quality. The superior tracking performance also made it more suitable for capturing fast paced action.
Having said that, the Crane 2 is an incredibly good DSLR and Mirrorless camera gimbal that costs less and has a few advantages of its own. If you come across a second-hand one in good condition or find it heavily discounted, it may be too good to pass up on.
Having trouble figuring out which gimbal to get for your DSLR or mirrorless camera? Check out the list of my favorite gimbals for DSLR.
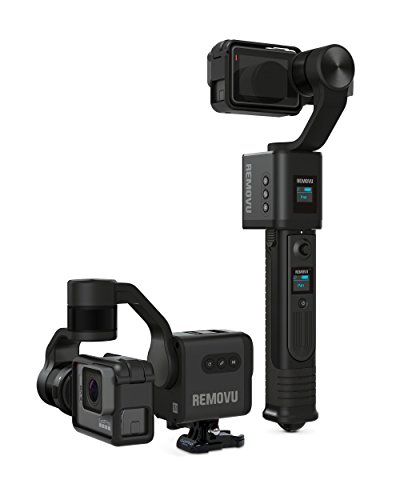
Unlike many generic gimbal manufacturers, Removu is a small Korean brand with a much more focused mission statement. They are dedicated to designing innovative new accessories—specifically for the GoPro. Upon learning about the Removu S1, it was immediately clear the engineers there were doing things differently.
The Removu S1’s killer feature is that its handgrip can be easily detached from its body. The result is an incredibly versatile gimbal that can be handheld, mounted or used as a wearable gimbal.
When I go biking, I’ll typically take my FeiyuTech WG2X Wearable Gimbal and wear it around my chest chest. However, I need to remember to pack another handheld gimbal for everything else.
For precisely that reason, the Removu S1 is off to a very promising start. Let’s see whether or not the Removu S1 is any good in practice.
First Impressions
As soon as I opened the box I was impressed by the very attractive zipper case. The gimbal and its bundled accessories were neatly seated within the case’s foam padding.
One thing that really struck me about the Removu S1 was just how good the damn thing looked. I’ve seen a lot of gimbals and this is definitely one of the sexiest I’ve ever seen. The gimbal has a somewhat retro aesthetic to it which is perfectly complemented by Removu’s bold logo.
Compatibility
Just as you’d expect from a company focused solely on developing accessories for the GoPro, they’ve definitely tried their best to accommodate all GoPro users.
The GoPro frame housing will fit the GoPro HERO 3/3+/4/5/6/7, the Session Cube and most likely any future GoPro.
They’ve also included frame housing for the GoPro’s biggest rival, the Yi 4K+ and the Garmin VIRB action cameras. More housing frames are also available on the Removu store.
Box Contents
Removu S1 Gimbal unit
Handgrip with detachable wireless remote
Frame housing for GoPro, Yi 4K and Garmin VIRB
Li-Polymer Battery Pack
Charging Dock (can simultaneously charge 2x battery and wireless remote)
Handle caps, wrist strap
Features
Being a 3-axis gimbal, the Removu S1 is designed to get rid of unwanted camera shake in the pan, tilt and roll axis. 3 brushless DC motors rotate 3 pivots in the opposite direction to undesirable movements, thereby negating any kind of shake or vibration.
As already mentioned, the S1’s removable handgrip means it is a 2-in-1 handheld and mountable/wearable gimbal. The opportunities are endless – on a custom selfie stick, on your bike’s handlebars or worn around your chest. As long as it fits the S1’s quarter-inch screw thread needle, you’re good to go!
Removu also took the modular design a step further by ingeniously tucking a wireless remote into the handgrip. That’s a totally logical and awesome idea.
The compact wireless remote is no slouch either. With its small LCD display and ergonomic design, I found it very practical to use. It certainly beats controlling your gimbal remotely using your iPhone/Android.
If you thought that was the end of the S1’s innovative feature list – we’re not done yet.
According to Removu, the S1 gimbal, its motors and the bundled remote are all IP65 rainproof (not waterproof though, so don’t take it underwater). Now that’s a first (but hopefully not the last) for a GoPro gimbal. I personally didn’t want to get it wet so can’t vouch for how well it handles rain or snow, but I will take their word for it.
Shooting Modes
The shooting modes on the Removu S1 are pretty much what you’d expect from any of the gimbals you can pick up today. Pan Following: The S1 will lock the tilt (up and down) axis, keeping the camera’s position relative to the horizon steady, but allowing freedom to pan. Pan and Tilt Following: The S1 will only lock the roll axis. All axes locked: The S1 will lock the pan (side to side) tilt (up and down) and roll (GoPro tilting left or right) axes. Useful if you mount it on a moving object like a bike or car.
Video Stabilization Performance
The S1’s unique modular design doesn’t compromise video stabilization performance, at least from what I could tell.
The video stabilization performance is definitely good for a gimbal of its price, but I’d rate it slightly worse than strong performers like the Feiyu Tech G6.
The maximum follow speed of the motors also felt a tad slower than other high end gimbals. It’s sufficient for most purposes but hardcore thrill seekers might find it doesn’t quite keep up with the action.
Many users and other reviewers have commented on the Removu S1’s loud motors. Personally, I didn’t find them to be too noisy, but then again I typically film scenes where perfect audio is more of a bonus than a requirement. If I was a vlogger with a lot to say, perhaps those motors would become an issue.
Thoughts after 1 week of using the Removu S1
The S1 looks amazing and its unique modular design gives it versatility that every other gimbal lacks. The stabilization performance is very decent and there’s nothing that really stands out as being particularly bad. Given that, it should be very close to being the perfect gimbal.
Yet, for some reason, I found myself enjoying my time with the Removu S1 less than I’d hoped. It didn’t feel as natural in my hands as the GoPro Karma. It didn’t have the perfect stabilization performance of my Feiyu G6.
In other words, the S1 is kind of a jack of all trades, but master of none. It’s a fantastically clever piece of kit that just misses the mark.
Verdict
All in all, the Removu is an great gimbal that makes a lot of sense if you’re looking for a one-size-fits-all solution to your GoPro stabilization needs. It does well in every respect, but at the same time doesn’t shine in any aspect.
With a very reasonable price tag, I definitely think this is a sensible purchase decision for someone who intends to use their GoPro in a variety of ways. Especially if your budget doesn’t allow you to have more than one gimbal.
However, if your GoPro uses are fairly limited, I’d personally recommend something that fits that purpose best.
Rating: 4/5
The Removu S1 is our favorite 2-in-1 (handheld and wearable) gimbal in our GoPro Gimbal Buyer’s Guide.
Sale
REMOVU S1 3-Axis Gimbal with Wireless Remote Control for GoPro HERO7, HERO6, HERO5 Black, HERO5 Session, Session, HERO4, HERO3+ and 3
Compatibility. HERO7, HERO6, HERO5 Black, HERO5 Session, HERO Session. IMPORTANT NOTE!: HERO4, HERO3+, and HERO3 can be used in DRY operation using frame housing included. Rainproof operation for HERO4, 3+ and 3 requires Rainproof housing that is sold separately
3-Axis stabilizing gimbal, offering PAN, FOLLOW, LOCK modes. Manufactured with world class brush-less DC motors and rotary sensors, the S1 delivers extremely stable professional shots in any kind of activity
Rainproof design. The motors and S1 body are specifically designed to be water resistant
Handheld, Mountable, Wearable. REMOVU S1 is the world's first hand-held and mountable gimbal. The S1's handle can easily be detached from the S1 body, transforming the S1 into a mountable gimbal that can be attached on any GoPro compatible mounting system
Wireless remote control. REMOVU S1 is equipped with a detachable wireless joystick remote control. Using 5-way jog key wireless remote, it can control the angle of camera and change the mode on the gimbal
Following my review of the DJI Osmo Mobile 3, a couple of readers notified me that I was wrong to call it the first foldable gimbal. And indeed, I realized the foldable Moza Mini S and Snoppa Atom had somehow slipped under my radar.
I’ve had experience using Gudson Moza camera equipment before, including the Moza Air 2 DSLR gimbal and Moza Mini-MI smartphone gimbal. They do a perfectly good job of stabilizing video, but tend to lack the finesse and build quality found in DJI and Zhiyun gimbals. So does the Moza Mini S buckle the trend or is it another gimbal that falls short of the competition?
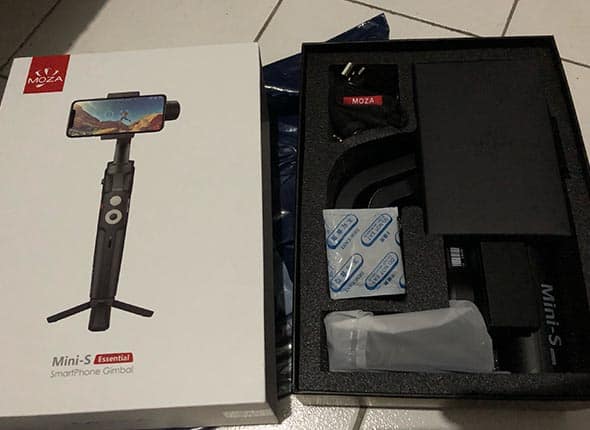
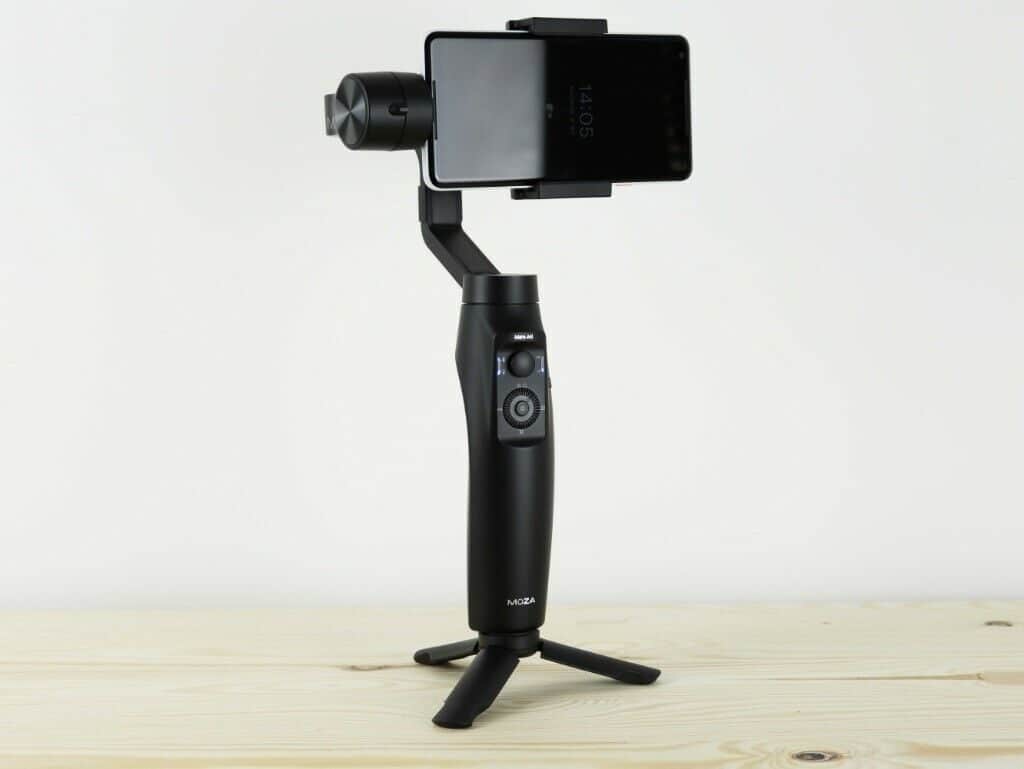
MOZA Mini-S Essential Foldable Phone Gimbal
Moza typically price their gimbals aggressively, and in the case of the Mini-S they’ve really taken things to the next level. At $79.99, it’s one of the cheapest gimbals I’ve ever reviewed.
It’s no secret that gimbal prices have been coming down (just 3 years ago and you’d be paying in excess of $300), but $79.99 for a gimbal with an impressive set of features came as a real surprise.
First Impressions
Out of the rather unremarkable box, the Moza Mini-S failed to impress me with its plasticky build.
Phone gimbals are almost always made from plastic, but the Mini-S felt extra cheap, partly because of the hollow hand grip which looked ready to split open at any moment. (I have a feeling the hollow hand grip is a result of the protoype’s built-in selfie stick which mysteriously went missing).
The absence of a rubber grip and the fairly large and ugly “Mini-S” branding down the side of the grip means Moza yet again lack the class that DJI and Zhiyun gimbals have.
Features
The standout feature of the Mini-S is obviously its ability to fold up. Folded up, it is only 5.12 inches wide, 2.68 inches deep and 7.68 inches high.
To put things into perspective, your average non-foldable smartphone gimbal are over twice as long as an iPhone XS Max. By comparison, the folded Mini S is only an inch and a half longer than the XS Max. The gimbal arm also packs in nicely and isn’t left flailing around. This makes it much easier to fit into a small bag or backpack.
Other than that its features are fairly standard. A joystick to electronically pan and tilt the camera, various other controls (including focus control and a multi-function rear trigger) and a quarter-inch mounting hole. Moza also went with the latest USB-C standard for the Mini-S.
Although at CES the Mini-S prototype featured a selfie-stick built-in (much like the Feiyu Vimble), the release version of the Mini-S does not have one. It would have definitely been a nice touch and something to differentiate itself from the competition, but my guess is that it compromised the resilience of the gimbal too much (the last thing you want is your phone dropping into the ocean because of a snapping selfie stick).
Gimbal Modes
The Moza Mini-S has 6 recording modes:
Pan Following
Tilt Following
FPV Mode
All-Locked
Sport Gear mode
Inception mode
The first 4 are all standard gimbal modes, but some of you are probably wondering what the ‘Sport Gear’ and ‘Inception’ modes are.
The sport gear mode simply maxes out the speed of the motors, meaning it follows panning movements much faster. If you want pan and follow fast moving objects, like a car blazing past you on the track, this is the mode you’ll want to use.
Moving on, the inception mode allows the camera to rotate 360° on the roll axis as it’s moving forward or backwards. It’s a pretty cool type of shot, although you’ll very rarely find yourself using it.
Compatibility
The Mini-S has good compatibility with iPhone and Android devices, which can be mounted by simply pulling apart the spring loaded clamps and sliding them in.
Its max supported payload of 260g is impressive, beating out the likes of the DJI Osmo Mobile 3 and Zhiyun Smooth 4. The clamp can accommodate any phone with a width ranging from 55-88m, so it can handle larger phones like the iPhone 8 Plus and Huawei P10 Plus.
Moza Genie App
The Moza Genie companion app lets you pair the gimbal to your phone over Bluetooth and perform things like advanced calibration as well as take panoramas, hyperlapses and more.
Despite Moza being one of the bigger players in the gimbal market, the Genie app feels unpolished. While the iOS app is mostly free from issues, the Android version has various issues with zooming, object tracking and occasionally crashes unexpectedly.
There’s always the option of simply using the default camera apps or a good third-party photo/video app like Filmic Pro, but it would be nice if Moza released a decent companion app to begin with.
Moza Mini-S VS DJI Osmo Mobile 3
It makes perfect sense to compare these two iPhone/Android gimbals because they are the two best-selling folding gimbals on the market right now.
Although the Moza Mini-S is cheaper, after using the Mini-S I noticed there were a number of things the Osmo Mobile 3 simply did better.
First, the L-shaped arm on the Osmo Mobile 3 is purposefully angled so that the rear motor won’t get in the frame when shooting. On the Moza Mini-S, the motor came into the frame when I used my Xiaomi Mi 9.
Second, switching between portrait and landscape mode requires you to physically flip the mount, whereas on the Osmo Mobile 3 it is a simple case of double tapping the M button.
There’s also a big difference in battery life, with the 2450mAh battery in the Osmo Mobile 3 lasting up to 15 hours, compared to the 5 hours you get with the battery in the Mini-S.
Although stabilization performance is almost equal, there’s nothing the Moza Mini-S really does better than the Osmo Mobile 3, so it’s a simple question of cost versus better quality and more features.
Verdict
Pros
Folding design
Good stabilization performance
Price
Cons
Cheap build quality
Buggy Android app
Short battery life
My review might seem somewhat harsh towards the Moza Mini-S. And to be honest, I’ve been a little unfair because there is no doubt that this is a great gimbal. It is objectively better than the likes of the older DJI Osmo Mobile 2 which I was full of praise of back at its release.
However, the latest DJI Osmo Mobile 3 really spoiled me, and compared to that the Mini-S simply isn’t as good.
For $79.99 the Mini-S is no doubt a terrific bargain, and worthy of a spot in my list of the best gimbals for smartphones. However its poor build quality, buggy app and short battery life make it difficult to depend on for more serious mobile filmmakers.
Smartphone gimbals have been getting cheaper and cheaper thanks to a large number of Chinese manufacturers competing for their piece of the cake. The excellent DJI Osmo Mobile 2 and Zhiyun Smooth 4 are the most popular iPhone/Android 3-axis gimbals out there, but when one of my readers suggested I check out the Moza Mini-MI I was immediately taken aback by its features for a budget gimbal.
I have reviewed other budget (under $100) iPhone gimbals in the past, and the conclusions have always been the same. You’ll save money, but at the cost of build quality and image stabilization quality. In other words, they’re inferior in almost every respect other than cost.
But with the Moza Mini-MI, there are a few features that you simply don’t find on any other gimbal, including the more expensive ones. On paper this really could be the DJI Osmo Mobile 2 killer, so let’s see how it turned out after I got my hands on one.
Moza Mini-MI Smartphone Gimbal
First Impressions
The Moza Mini-MI comes bundled with all the things you’d expect from a smartphone gimbal. A rather sleek semi-hard plastic case, Micro-USB charging cable and a mini tripod. As cheap as they may be, I always appreciate when gimbal manufacturers include a mini tripod since they are useful for hands-free recording off a flat surface or acting as a kind of monopod when its legs are closed.
The gimbal itself is noticeably larger and heavier than other gimbals I’ve used. It weighs 543g with the battery, making it roughly 50g heavier than your average gimbal. The handle is thick and comfortable to use, but those who are after a compact gimbal might find the Mini-MI a little big.
I also noticed the gimbal packs a total of 3 quarter-inch thread screws – more than any other gimbal I have tested. There is one at the gimbal head, one at the back of the handle and one more at its base. This means you’ll be able to connect accessories such as tripods or microphones in a variety of different configurations.
Build-quality wise, the Mini-MI doesn’t feel quite as solid as the Osmo Mobile 2 or Freevision Vilta-M. Then again, those are the best in the business when it comes to build quality, so it wouldn’t be completely fair to draw comparisons given the price difference.
Mounting your iPhone or Android device to the gimbal is done in much the same way as any other smartphone gimbal. Simply temporarily unlock the spring loaded clamp and slot in your phone.
Compatibility
The Moza Mini-MI has powerful motors which give it an impressive max payload of 300g. This means even the heaviest smartphones won’t be too heavy, and the max supported width of 61-92mm means I can’t think of any phone that would be incompatible with the gimbal.
The Mini-MI’s killer feature, the wireless charging, uses the Qi wireless charging standard so will be compatible with almost any phone that supports wireless charging.
Features
For a budget gimbal, you wouldn’t expect the number of features the Moza Mini-MI is packing. In fact, feature-wise, the gimbal has the likes of the DJI Osmo Mobile 2 beat.
Perhaps the biggest feature is wireless charging. While other gimbals conveniently double up as power banks, you need to use one of their USB ports along with a charging cable.
With the Mini-MI, simply mounting your wireless charging capable smartphone will charge the phone. If you’re the kind of person that often finds themselves short on power, you won’t find a more convenient way of charging your smartphone.
Another standout feature is the Mini-MI’s impressive range of motion. The Mini-MI can pan 360° without issue, where other gimbals often fall short. This is great for those wanting to do full pan shots.
Shooting Modes
Another win for the Mini-MI is its shooting modes. We typically expect a smartphone gimbal to have locked (all axes locked), pan-following (tilt and roll axes locked) and following (only roll axis locked) modes.
However, the Mini-MI allows for much more granularity in the following mode by letting the user to independently lock each axis (pan, roll and tilt) allowing for a total of 8 combinations.
I will say that personally I did not find myself taking advantage of this ability to independently lock and unlock each axis. In fact, I reckon most users will not either as few situations call for it, but it’s still nice to have as an option.
In addition to these standard shooting modes, the Moza App also has some unique shooting modes. The first is the Sports mode which increases the motor speed, making it perfect for capturing fast footage. The second is selfie-mode, which flips the phone at the press of a button. Finally, there’s the ‘Inception Mode’, where the Mini-MI will perform a barrel roll allowing for some creative shots.
Performance
We’ve established that the Moza Mini-MI has a seriously extensive list of features, but ultimately a gimbal should be about effectively delivering that silky smooth, shake-free footage.
The Moza Mini-MI has good image stabilization performance, but not the best.
Performance wise, it is almost identical to other budget gimbals like the Hohem iSteady Mobile. It doesn’t do quite as well as the more expensive DJI Osmo Mobile 2 or Zhiyun Smooth 4. Here’s a video comparing its footage with the Osmo Mobile 2.
Battery Life
Despite being a rather bulky gimbal, the Moza Mini-MI only packs a 2100mAh battery that lasts 10 hours off a full charge. That’s certainly not bad, but behind many other gimbals which have a 15+ hour battery life.
Verdict
Overall, the Moza Mini-MI is a tremendous gimbal, especially for the price. It definitely earns itself a place in my list of best gimbals for the iPhone. There is even an argument that it is a better overall gimbal than the Osmo Mobile 2 thanks to its generous number of features.
The wireless charging and range of motion are its key strengths, although it also boasts a high max payload and great flexibility in shooting modes.
However, despite all its strengths, the image stabilization performance and build quality are definitely that of a budget gimbal. In all honesty, the difference is very small, but as someone who judges a gimbal’s worth first and foremost on stabilization performance, I don’t think it would be fair to call it the best smartphone gimbal out there.
Rating: 4/5
Pros:
Wireless Charging
Price
Range of motion
Plenty of shooting modes
Cons:
Budget build quality and image stabilization performance
Turning off your GoPro is the simplest way to preserve its battery life when not shooting video. Turning the GoPro off is a simple process that can be achieved in a few ways.
However, many users experience battery drain while the GoPro is turned off. We’ll therefore also discuss some nuances after explaining the basic procedure.
Turn Off GoPro HERO7/6/5
Here are the various ways you can turn off your GoPro HERO7 Black/Silver/White, HERO6 Black and HERO 5 Black.
Method 1: Using The Mode button
Press and hold the mode button for 2 seconds
The camera will beep several times and the camera status lights will flash.
Method 2: Using Voice Control
More recent GoPros (beginning with the HERO5 black) support voice control. One of the voice commands will turn off your GoPro.
Make sure voice commands are enabled in settings
Say “GoPro turn off”
You can also turn on your GoPro using the voice command “GoPro Turn On” if the ‘wake on voice’ setting is enabled. Note that the camera will only be listening to voice commands for 8 hours after being turned off.
Learn more about GoPro voice commands and supported devices.
Method 3: Using Auto Power Off
Find ‘Auto Off’ or ‘Auto Power Off’ (exact wording depends on your model) in your GoPro settings/preferences.
Choose between 5/15/30 minutes. Choose never if you do not want to activate this feature.
Your GoPro will automatically power off after 5/15/30 minutes of inactivity.
Turn Off GoPro Fusion
Like the other GoPros, the GoPro Fusion can be turned off by either holding the mode button for 2 seconds or using the voice command “GoPro Turn Off”.
However, it is not possible to adjust the ‘auto power off’ time. GoPro Fusion cameras will automatically turn off 7 minutes after you have stopped recording.
Turn Off GoPro HERO5 Session
The GoPro HERO Session doesn’t have a direct method for turning it off. Instead, the camera will automatically turn itself off when you are not recording video or taking photos.
Reducing Battery Drain when your GoPro is off
Many users report that their battery is quickly drained even when the GoPro is turned off.
The most common cause is that WiFi and/or Bluetooth are still active when the GoPro is off. To ensure that your camera is truly off, make sure to disable these by going to the ‘Wireless Connections’ in settings before turning your GoPro off.
Using QuikCapture To maximize battery life
QuikCapture is a special feature on most GoPros that is disabled by default (with the exception of the HERO Session / HERO4 Session, and HERO5 Session).
When it is enabled, your GoPro will automatically turn on and start recording when you press the shutter/select button. The GoPro will turn itself off as soon as you stop recording.
Many of us have a bunch of videos on our computers that we’d love to put on our iPhones.
Unfortunately, the process of transferring media between the two isn’t quite as straightforward as you might think.
Unlike Android, the iPhone doesn’t let you simply connect to your computer’s USB port and drag and drop files into its storage. So, how should you put videos that you recorded or downloaded onto your iPhone for offline viewing?
There are four ways of going about this:
Using iTunes
Using third party software (PC/Mac)
Using Airdrop (Mac only)
Using the cloud
Let’s go through each method in greater detail.
Method 1: Using iTunes
Using iTunes is a very popular way of transferring music, photos and videos to your iPhone. It is, after all, Apple’s very own solution.
Connect your iPhone to your computer using a Lightning-to-USB cable
Launch iTunes on your computer
Navigate to File > Add to Library or File > Add Folder to Library
Locate the video you want (or folder of videos) and then click Open. Your video(s) are now part of your iTunes library.
Click on iPhone > Movies.
Tick the Sync Movies checkbox
Select the video(s) you just imported to your iTunes library and press Apply/Sync. Your video(s) are now on your iPhone.
Why I’m not a fan of the iTunes method
Apple designed iTunes with the intention that it would be your all in one media library across all your devices (computer, iPhone, iPad etc.) While this has some advantages, it also comes with its own set of problems:
Forces you to import videos to your iTunes library first, only then can you transfer it over to your iPhone. It’s a two step process.
iTunes on Windows isn’t good and there are much better media library alternatives out there
Many video formats are unsupported by iTunes.
Potential syncing issues (e.g. deleting media on one device effects other devices)
As a result, I personally don’t use iTunes to put videos on my iPhone anymore.
Method 2: Using A Third Party App (PC and Mac)
For PC users, using a third party iPhone file transfer app is both the simplest and fastest method. This is also one of the best methods for Mac users–although the Airdrop method (discussed below) is also a good method.
There are numerous iPhone file transfer software solutions out there but my personal recommendation is AnyTrans.
Let’s take a look at how you can use AnyTrans to put videos on your iPhone. Other apps will follow a similar procedure.
With your iPhone connected to your computer, launch AnyTrans
Go to Device Manager
Select the type of file you wish to transfer to your iPhone. For videos, select Videos.
Select the type of video you want to transfer and then press the ‘+’ button
Locate the video you want to save to your iPhone
As you can see, using a third party app like AnyTrans is far more intuitive than using iTunes.
Note that this software is not free. If you want a free solution EaseUS MobiMover is a good alternative, although lacking in features and not quite as intuitive.
Method 3: Using Airdrop (Mac only)
Mac users have the option to put videos on their iPhone using the awesome Airdrop feature. Here is how you do it:
On your Mac, open your Finder.
On the left sidebar, locate Airdrop. Alternatively, Choose Go > AirDrop from the menu bar in the Finder.
Turn on bluetooth if it isn’t already on.
You should see your iPhone device as one of the nearby devices. Make sure your iPhone has Bluetooth and WiFi turned on.
Drag and drop your video(s) to your iPhone device. Voila.
Note: Airdropped files are automatically handled by an app on your iPhone that can open the file. If your video has a format that can’t be handled by any of your iPhone apps, you can’t transfer the video. I therefore recommend downloading VLC for Mobile on your iPhone which can basically play any type of video you throw at it.
Method 4: Via The Cloud
The last method is to use a Cloud service. The most popular Cloud services are Apple iCloud, Google Drive, Microsoft OneCloud and Dropbox. This method is, however, heavily limited by space and transfer speed constraints.
Regardless of which cloud service you choose, the process is the same:
On your PC/Mac, upload the video to the cloud by downloading the cloud provider’s client. This may take a while.
On your iPhone, use the corresponding Cloud app to download the video you just uploaded.
I would personally recommend Google Drive because it has a generous amount of storage space on the free tier. The iPhone app for Google Drive can be downloaded here.
I wouldn’t suggest using Apple iCloud to host your videos as its space is limited and its compatibility with Windows and Android is poor.
The last few years has seen a dramatic increase in the number of new GoPro gimbals coming out. Simultaneously, more and more affordable options are entering the market.
What used to be considered an accessory reserved for enthusiasts, 3-axis motorized gimbals are now available for the average GoPro user.
The Hohem iSteady Pro is exactly that, and with a price point below $100, it will no doubt tempt some of the more casual video shooters out there.
With that in mind, let’s take a look at whether this very reasonably priced GoPro accessory is actually worth your money.
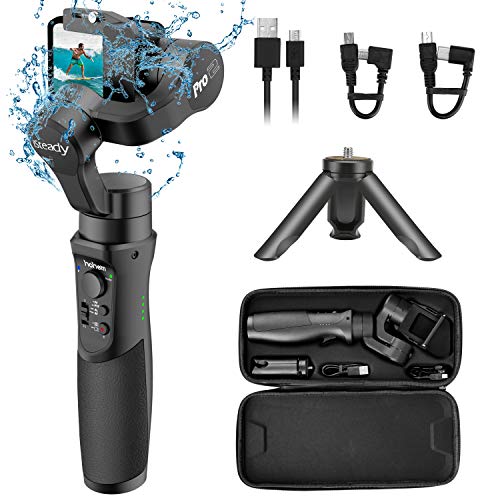
Hohem GoPro Gimbal Stabilizer, iSteady Pro 2, 3 Axis Splash-Proof Gimble IP64, Handheld Stabiliser for DJI Osmo Action,GoPro Hero 7/6/5/4/3,SJCam,YI 4K Action Camera (2019 New Model)
One of the few sub-$100 GoPro gimbals
Joystick panning and tilting
Long battery life
First Impressions
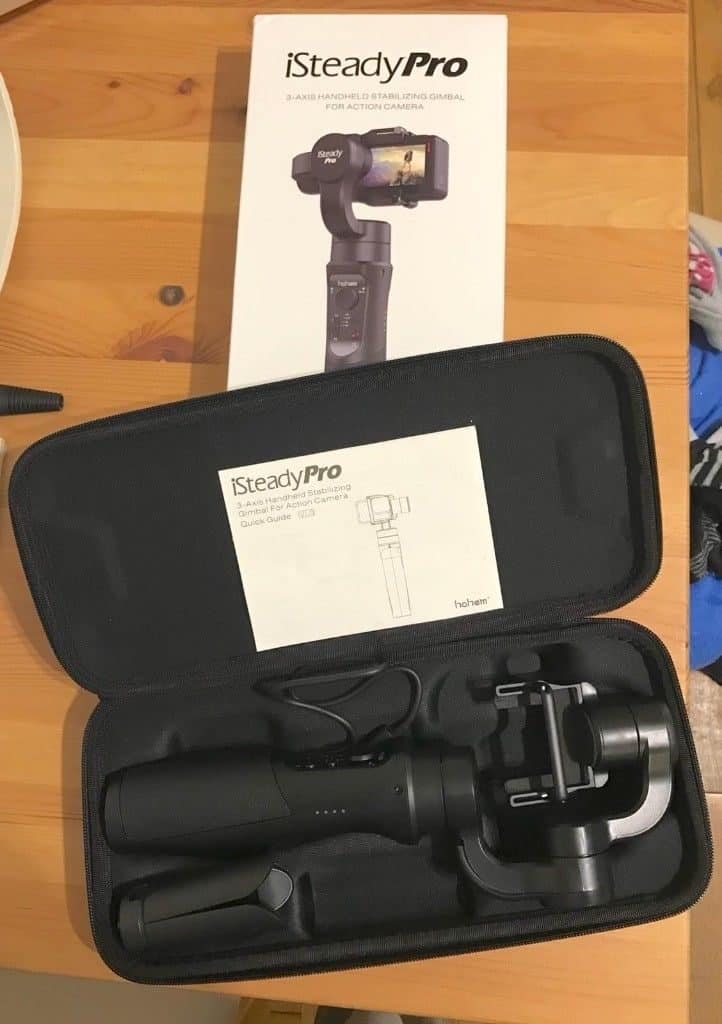
Right out of the box you can tell this is marketed towards the more casual user. It’s packaging is much smaller and lighter than the high end gimbals many gimbal owners will be familiar with.
A nice carry case as opposed to a simple carry pouch is generously included. Inside you’ll find all the bundled accessories which include a micro USB charging cable and very small tripod.
When I first got my hands on the gimbal, I couldn’t help but feel the build quality was a notch below more expensive gimbals. Many high end gimbals also have a plastic base construction, but the Hohem iSteady Pro felt lighter and more plasticky.
Nevertheless, it would be rather naive to expect a sub-$100 gimbal to feel just as well built as a gimbal that costs twice as much.
Moving on, the GoPro/action camera attachment clip. Unlike high end gimbals which feature detachable clips, The iSteady Pro makes do with a fixed clip. As a result, there’s no chance of using it with your smartphone.
For custom attachments, the iSteady Pro features to quarter-inch screw thread holes for accessories like the included Tripod. One is on the side of the grip and the other is at the base of the gimbal.
The Hohem iSteady Pro features a total of 3 USB ports. The standard USB port is to make the gimbal function as a powerbank and allow you to charge whatever device you might have. The micro USB port on the side of the grip is for charging the gimbal itself. Meanwhile, at the head of the gimbal is a mini USB port which was presumably designed to directly connect with the mounted device. I personally found the positioning of the mini USB port on the head to be too inconvenient for charging my GoPro HERO7 and HERO5.
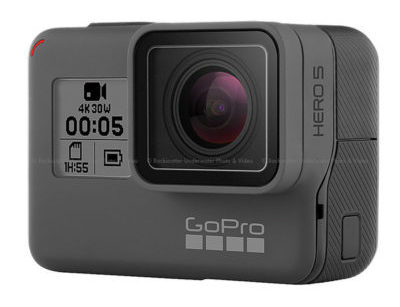
Compatibility
The Hohem iSteady Pro is compatible with the GoPro 3/3+/4/5/6/7 and similarly sized non-GoPro action cameras. Note that the way you attach your GoPro will depend on its model. With the GoPro 5 and above you’ll mount it with the lens beside the motor, and vice versa with any of the older GoPros.
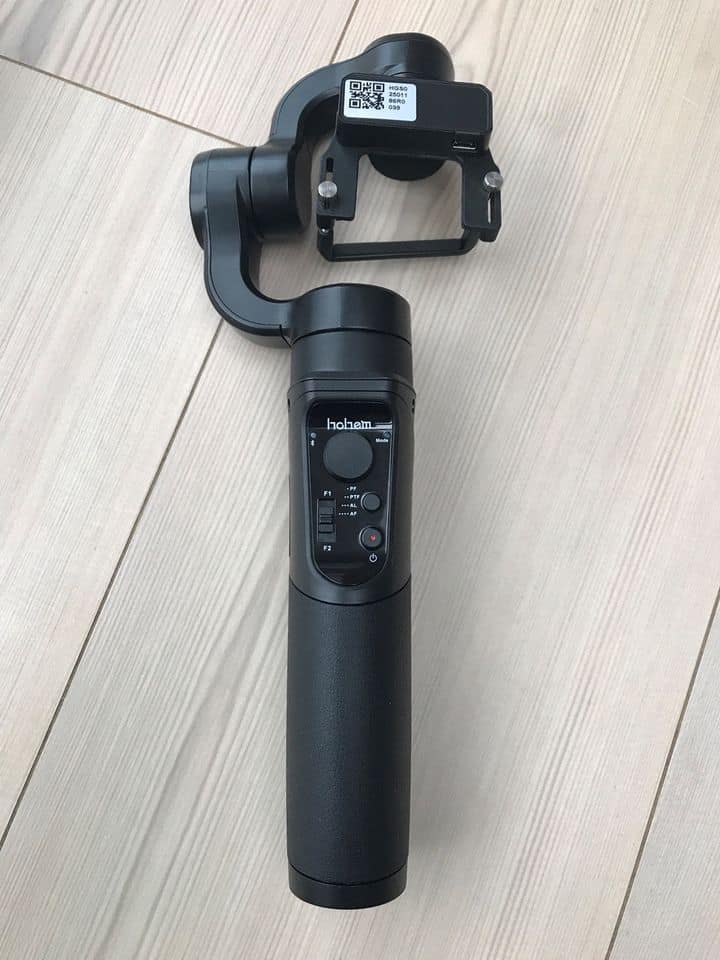
Controlling the Hohem iSteady Pro
For a budget gimbal, the Hohem iSteady Pro packs in a great number of controls and shooting modes.
LED indicators will tell you which mode you’re in and whether you’re connected to your smartphone via bluetooth.
The iSteady Pro has several buttons that are used for its control. An on and off button and mode toggle button both simple buttons that don’t need further explanation. In the center is a button to trigger quick lock, and to the left side is a button that can be assigned a custom mapping via the app.
Besides them, the gimbal features a joystick that allows you to control the pan (side to side motion) and tilt (up and down motion) of your camera. A nice thing about the iSteady Pro is that it has a 360-degree range of motion in the pan axis. That’s better than some gimbals which can only pan 90 degrees left or right.
Shooting Modes
By default the iSteady Pro will turn on in pan following mode. That means it tilts up and down to keep the shot level, but allows you to pan left and right freely. Since it is a 3-axis gimbal, it will also correct in the roll axis (that’s when your camera tilts, or rolls, left or right).
It’s worth noting that unlike some gimbals which don’t make it clear what shooting mode you’re in, this gimbal uses a flashing indicator to indicate its current shooting mode.
The second mode is the pan and tilt following mode. This basically means it will lock the roll axis and negate any roll, but allow (smooth) movements in the tilt and pan axes.
The third shooting mode is the all locked mode. All three axes are locked, meaning the gimbal will do its best to keep the GoPro’s orientation locked. This is useful when the subject recording the video is still, but the environment is unsteady – e.g. in a car or on a boat.
Lastly, we have the all following mode. This basically means the gimbal will follow movements in all axes, but smooth those movements out. I personally find myself using this mode least as I am rarely in situations where I actually want to roll my camera left or right. However it’s nice to have this shooting mode as an option nevertheless.
Hohem Gimset App
The Hohem Gimset is an iOS/Android app that allows you to connect your iSteady Pro to your phone. The following things can be done via the app:
Gimbal calibration
Remotely control your gimbal (e.g. change shooting mode, pan left and right)
Configure settings (e.g. motor speed, joystick sensitivity)
Update firmware, digital user manual
A nice feature is that the settings can be saved under various profiles. Therefore, you could potentially have one setup that has a very fast follow speed, and one that has a much slower one.
For example, if you’re filming downhill biking you could use a profile where the follow speed is fast to emphasise the intensity nature mountain biking. Meanwhile, you could use a slow follow speed profile to film a relaxing walking tour through a city.
Overall, I highly rate the Hohem Gimset app. It isn’t perfect but it is definitely one of the better manufacturer provided apps.
Stabilization Quality
The stabilization quality of the Hohem iSteady Pro was pleasantly surprising given my somewhat low expectations going in. It was very comparable to the likes of my Feiyu G5 which costs twice as much.
I tried it with both my GoPro HERO3+ and GoPro HERO6. Both produced good results, with the HERO6 being slightly better thanks to its superior built-in image stabilization.
Another positive I took away from using the iSteady Pro was the relatively quiet brushless motors. Being a smaller gimbal, the smaller motors themselves produce less noise.
Conclusion
The Hohem iSteady Pro will be a massive improvement over any gimbal-less setup and isn’t missing any features that more expensive gimbals might have. For under $100 you’d be hard pressed to find a better alternative.
The only thing holding it back is its relatively cheap build quality. While mine hasn’t had any problems and online reviews are overwhelmingly positive, I wouldn’t feel very comfortable doing anything too adventurous with this gimbal.
Overall the Hohem iSteady Pro offers fantastic value for money and offers real 3-axis motorized gimbal stabilization to the masses. Just make sure you handle it with some care.
Rating: 4/5
The Hohem iSteady Pro is currently our favorite budget gimbal in our GoPro gimbals buying guide.
Hohem GoPro Gimbal Stabilizer, iSteady Pro 2, 3 Axis Splash-Proof Gimble IP64, Handheld Stabiliser for DJI Osmo Action,GoPro Hero 7/6/5/4/3,SJCam,YI 4K Action Camera (2019 New Model)
When I got my hands on my first GoPro in 2013, I was eager to take it outside and use it as much as possible. However, walking around with a GoPro on a stick felt both unnatural and inconvenient. As a result, I never ended up making much use of my GoPro Hero 3+.
A couple of years later, I got into mounting biking and found a real reason for filming with a GoPro. I bought a GoPro Hero5 along with a chest mount and EVO SS Wearable Gimbal.
Since then, I’ve come to really appreciate the convenience of my using GoPro’s voice control. There’s no need to stop and fiddle with your GoPro anymore!
Does my GoPro have Voice Control?
GoPro models released before the HERO5 do not feature voice control.
Newer GoPros have voice commands. The GoPros that are voice command ready can understand 12 voice commands in 10 different languages.
The current voice command ready GoPros are the following, check if yours is on the list:
HERO7 (White, Silver, & Black)
HERO6 Black
Fusion
HERO5 Black
HERO5 Session
HERO (2018)
Remo
This is now a standard feature for GoPros so you can automatically assume any future GoPros will have this feature too.
If yours isn’t on the list, it might be time to consider upgrading. However, there are other ways of remotely controlling your GoPro, for example through the use of the GoPro App.
What languages does GoPro Voice Control understand?
The current list of languages that GoPro voice commands can be used in are the following:
English (U.S. , U.K. and Australian)
French
German
Italian
Portuguese**
Russian**
Spanish
Chinese
Korean**
Japanese
** Voice control is not available for these languages with Remo.
How do I use GoPro Voice Commands?
Using GoPro voice commands is incredibly easy and intuitive.
You’ll first need to enable voice commands by swiping down on the screen and tapping on the voice command icon. (If you need to change the language, you’ll also need to go into your GoPro’s settings -> voice commands and change it from there.)
Once that’s done, you’re all set! Your GoPro is now listening to you. Simply say any of the 12 following basic GoPro voice commands:
“GoPro Start Recording”
“GoPro HiLight” (Adds a highlight tag while recording video)
“GoPro Stop Recording”
“GoPro Take a Photo”
“GoPro Shoot Burst”
“GoPro Start Time Lapse”
“GoPro Stop Time Lapse”
“GoPro Video Mode”
“GoPro Photo Mode”
“GoPro Time Lapse Mode”
“GoPro Burst Mode”
“GoPro Turn Off”
There are also some other voice commands which are not available across all models:
“GoPro Turn On” (only with HERO7 Black, HERO6 Black, & Remo + HERO5 Black) – Learn about how it works here.
“GoPro Capture” and “GoPro Stop Capture” (HERO7 cameras only) – Start/stop capturing according to whatever mode you are in (e.g. video, timelapse, photo)
Secret GoPro Voice Commands
There are also two ‘secret’ voice commands that are not officially listed, but work:
“That was sick”
“Oh shit!”
These two voice commands have exactly the same effect as saying the “GoPro HiLight” command and will add a highlight tag while recording video. Pretty cool, huh?
Other ways to remotely control your GoPro
There are a few other ways to control your GoPro without actually having to touch the GoPro itself:
GoPro App with your smartphone
GoPro Smart Remote (compatible with GoPro HERO3 and up)