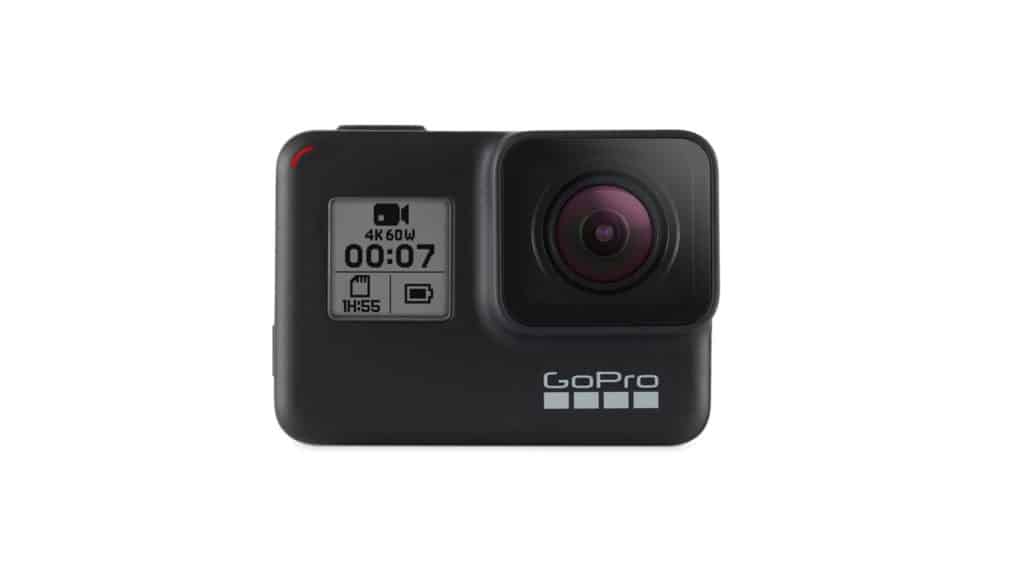
Live streaming isn’t really my thing, but one of my GoPro-crazy friends asked me to explain how they could live stream using their new GoPro HERO.
I’ve since had the chance to test and figure out how to live stream on a GoPro using various setups—and that’s precisely what I’ll be sharing with you folks today.
But before I continue, I’d like to point out that live streaming using your iPhone or Android’s camera is a better option for most cases. It requires less stuff, delivers equally good (if not better) video quality and live streaming is much simpler.
Live streaming is best done using your smartphone, but the GoPro is a better choice in some applications.
It therefore only makes sense live stream with your GoPro if you are doing anything more adventurous (like skateboarding or dirt biking, for example).
Anyway, here are some ways to live stream using your GoPro HERO.
RECOMMENDED METHOD: Live Stream Using A GoPro HERO7 Black
The GoPro HERO7 is currently the only model to support native live streaming
I can’t stress this enough: live streaming with any GoPro HERO other than the HERO7 Black is a big headache. I thankfully do have a HERO7 Black but if you don’t have one you’ll have to try one of the other methods.
With the HERO7 Black, GoPro have introduced native live streaming through the iOS®/Android GoPro app (if you own any GoPro and haven’t downloaded that already, boy have you been missing out).
Live Streaming Steps
Live streaming to various social media platforms such as Facebook, Youtube and Twitch is easy as pie.
Important: Make sure your GoPro HERO7 has a WiFi connection. If you are outdoors, you can create a personal hotspot on your phone and connect to that.
Make sure your GoPro HERO7 Black and GoPro app are synced.
Launch the GoPro app on your phone and select Live from preview mode.
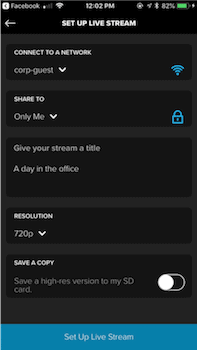
Tap Set Up Live.
Choose the platform you with to stream to. By default Facebook is selected. Tap the Facebook icon to change it to YouTube or Other.
If streaming to Facebook or YouTube, connect your account and approve permissions. If streaming to another platform, you’ll need to enter a RTMP URL. Refer to GoPro’s official guide for details.
Choose your stream resolution (480p or 720p).
Choose your save settings (you can optionally save a HD copy of your stream to your GoPro’s SD card).
Here is a list of all the platforms the GoPro HERO7 can directly stream to: Facebook live, YouTube, Twitch, Vimeo, INKE, HUYA, DOOYU, BILIBI, YY.
That’s a pretty extensive list, although currently live streaming to Instagram is still unavailable.
The Alternative: Live Stream Using A Third-Party App
Chances are you aren’t fortunate enough to own the HERO7 Black, it is after all the most expensive GoPro model. In that case, your options will involve the use of third-party apps.
Option 1: GoPro broadcasting on Vimeo’s Livestream App (iPhone Only)
Vimeo’s Livestream platform is a very powerful tool for anyone serious about live streaming.
Their iPhone app (The Android app is currently missing this feature) can broadcast live GoPro footage. You can stream to their servers, or alternatively stream to a whole raft of other platforms, including Facebook, YouTube, Twitch and many others.
The service works very well and is catered to serious live streamers. It has many advanced features such as analytics, cloud recording and more.
However, all this comes at a hefty cost. To use Livestream, you’ll need to subscribe to one of their plans.
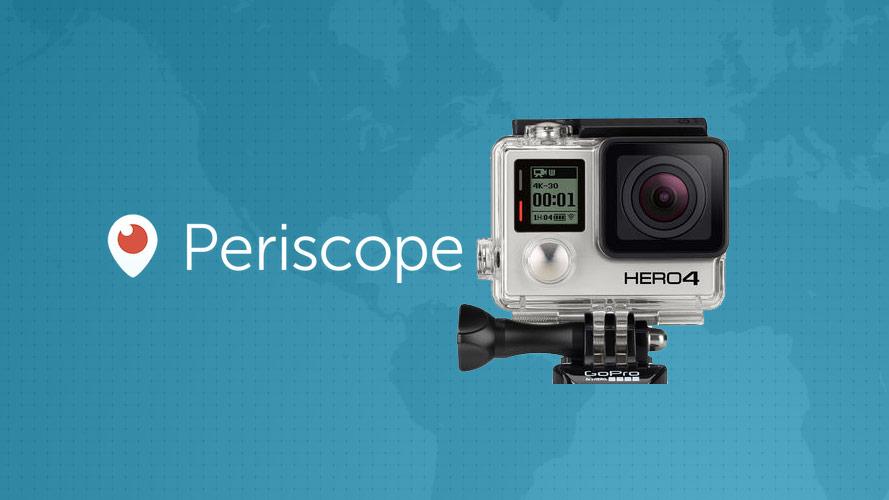
Option 2: Live Stream using Periscope (iPhone Only)
Another option for live streaming using your GoPro is through the Periscope app on your iPhone (unfortunately, Android users are out of luck, again).
For those of you that don’t know, Periscope is a popular live streaming app from Twitter that encourages social live streaming.
Note: This method isn’t compatible with all GoPro or iPhone models so check your setup is compatible first. Notably, compatibility with the HERO session models is absent.
The live streaming setup is fairly simple. You will need to make sure your GoPro and GoPro app are paired, then launch the Periscope app on your iPhone. It will automatically detect your GoPro’s feed and you are ready to stream.
Make sure the GoPro app is installed on your iPhone.
Download and install the Periscope app for your iPhone.
Link your GoPro to the Periscope app.
Link your social media accounts on the Periscope app to easily share your stream across your social media profiles.
Tap the video stream icon
Choose stream from your GoPro
Tap GoLive to stream on Periscope. You can also tap the other social media icons to share your live stream feed.
The main drawback of Periscope is that you are limited to streaming within the Periscope platform. That’s fine if you just want to invite some of your friends and family to check out your live stream, but useless if you want to live stream to your facebook live, YouTube or Twitch audiences (for example).
Option 3: Live Stream using LIVE4 (iPhone and Android)
Your last option (and pretty much the only 3rd-party option for Android users) is to download and use the LIVE4 app.
This app is dedicated to getting your GoPro feed on Facebook live. According to their website:
LIVE4 makes sharing video instantaneous. Begin streaming LIVE over your cellular connection from your GoPro® camera with the touch of a button. Let others see what your camera sees as it is happening. Simply login with your Facebook account, start broadcasting, and your friends will see what the camera sees instantly.
Live4.io
LIVE4 are planning to support streaming to YouTube and Instagram, but currently only streaming to Facebook live is possible.
Recommended Live Streaming Gear
Successfully setting up a live stream feed is one thing, but what about actually getting quality footage out there to your videos?
Here are some GoPro accessories that I have in my filming setup and will no doubt help those of you who wish to deliver higher quality live streams.
Grips and Gimbals
If you’re live streaming with your GoPro, chances are you’re doing something with a lot of movement. The last thing you want your viewers to experience is shaky camera footage. A good GoPro grip can help with that, and if you want a more robust solution, consider investing in a gimbal.
Microphone
While the GoPro’s in-built microphone isn’t bad, there are much better options available. An external mic makes even more sense if you plan on talking with your audience, since chances are your GoPro won’t be near your mouth.
Lighting Accessories
Lighting can always be an issue when live streaming. If you are pointing the camera at yourself, for example, it’s possible your face will dark and difficult to see clearly. External lighting accessories should definitely be considered in such cases.
Final Thoughts
While owners of the new, high-end GoPro HERO7 will have an easy ride to live stream, most GoPro owners will find themselves having to go through a couple of hoops.
Hopefully, native live streaming will become a standard feature in future models of GoPro.
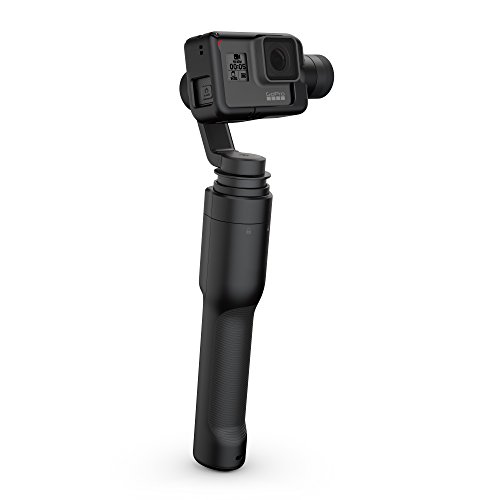
GoPro attempted to establish a presence in the camera drone market with the GoPro Karma drone. Unfortunately for them, however, this venture was a bit of a failure and it was eventually discontinued in 2018. However, the gimbal used on the drone lives on, now bundled with a hand grip that leaves us with the gimbal we’ll be reviewing today—The GoPro Karma Grip.
The GoPro Karma Grip has been on the market for a few years now and has long been regarded as one of the best gimbals for the GoPro. Yet it’s still priced considerably higher than many newer third party GoPro gimbals which also do a fantastic job of smoothing out footage. So in this review I’ll definitely be looking at it with a fresh pair of eyes in the context of GoPro gimbals in 2019.
First Impressions
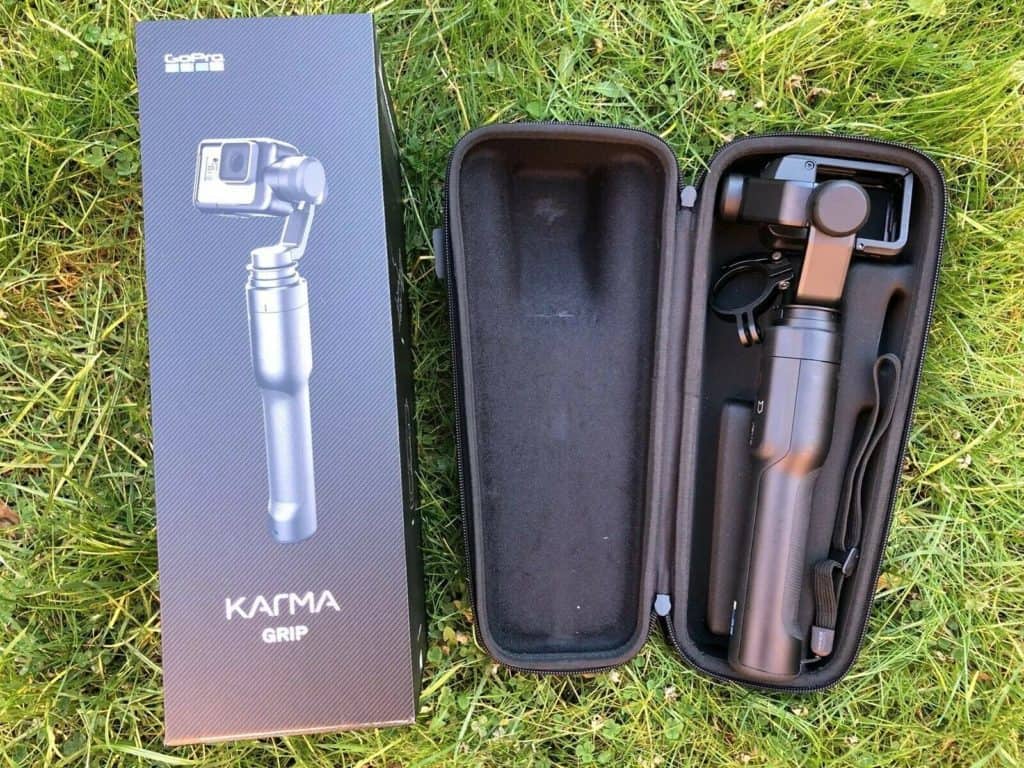
The Karma Grip comes with a nice semi-hard carry case that contains the gimbal stabilizer attached to the hand grip, a mounting ring, the GoPro harness and lastly a USB-C charging cable.
As you might expect from a gimbal that is made by GoPro themselves, attaching the GoPro to the stabilizer is a breeze. The included HERO harness means you simply have to unlock it, slot your GoPro in and then lock it again.
Compared to all the third party GoPro/action camera gimbals I’ve used, the Karma Grip is big. It’s bigger in size and weight, weighing around 580g with the GoPro attached. Some people have complained it’s too bulky and heavy, but personally I liked being able to feel the weight in my hands. The rubberized grip itself is the most ergonomic grip on a gimbal I’ve ever tested, and those with larger hands will definitely appreciate its thickness.
Compatibility
The Karma Grip is currently compatible with the HERO5 Black, HERO6 Black and HERO7 Black out of the box. It is also compatible with the HERO4 Black/Silver if you purchase a HERO4 harness.
It is not compatible with non-GoPro action cameras, which might be an issue if you’re considering going for a non-GoPro action camera in the future. Third party gimbals offer compatibility with a much greater range of action cameras, but that has its own downsides.
Controlling The Karma Grip
The Karma Grip is a very simple piece of equipment. GoPro have deliberately kept features to a bare minimum so you can pick it up and start recording straight away.
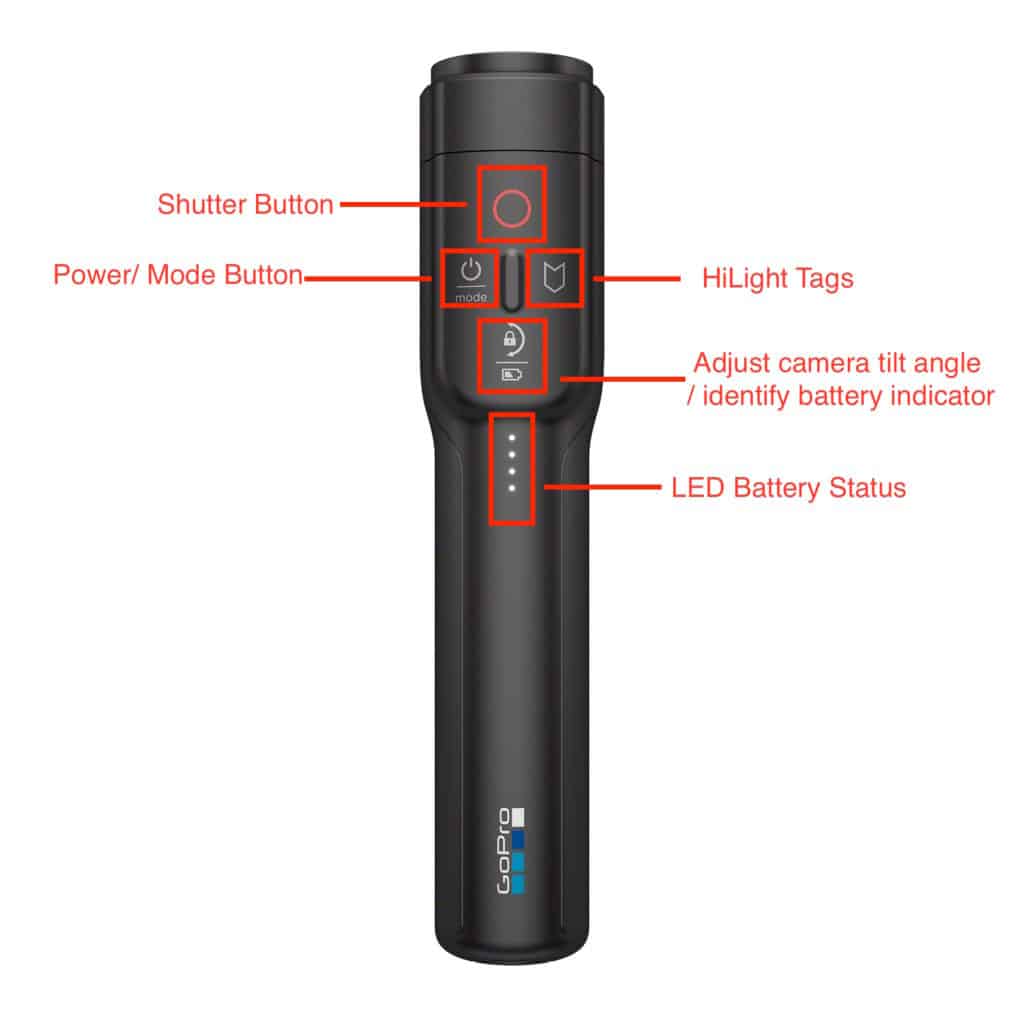
There are 4 buttons: a power/mode button, shutter button, tilt lock button and highlight button. Pressing the highlight button will mark a point in your recording so that it is easy to find in the future. The other buttons are fairly self-explanatory.
One notable absence is a joystick to electronically control the pan and tilt. Many gimbals feature this, but the Karma Grip does not. Personally, I very rarely find myself using joysticks on other gimbals, since using your hand is smoother and more fun. But there are definitely cases where having a joystick would be useful.
For those who love selfies, there’s also no ability to flip the GoPro backwards on the grip. So, if you want to record your own face you’ll have to hold the Grip the wrong way round.
Shooting Modes
The Karma Grip features just two shooting modes.
In following mode the Karma stabilizer will follow movements in the pan (left to right) and tilt (up and down) axes, albeit with footage being captured smoothly.
In pan follow mode the Karma locks the tilt axis, meaning the horizon is kept level. You can set the horizon beforehand using the tilt lock button.
There is no locked mode that many other gimbals feature. A locked mode will keep the GoPro’s orientation fixed, meaning the camera essentially stays fixed on the same spot. The lack of a locked mode is somewhat disappointing, but not a dealbreaker.
Stabilization Performance
There’s no question that the stabilization performance is one of the Karma Grip’s greatest strengths. Despite being an older GoPro gimbal, numerous firmware updates over the years has given it the superb stabilization it has today.
In comparison with the cheaper and very popular Feiyu Tech G6, I found the Karma Grip to suffer from less micro jitter when zooming in on footage. The Karma Grip’s superiority became even more noticeable when recording faster paced action.
Audio was, however, a slight issue. The Karma Grip has noisy motors, similar to those in the Removu S1 which I previously complained about having audible motor sounds.
Karma Grip As A Wearable Gimbal
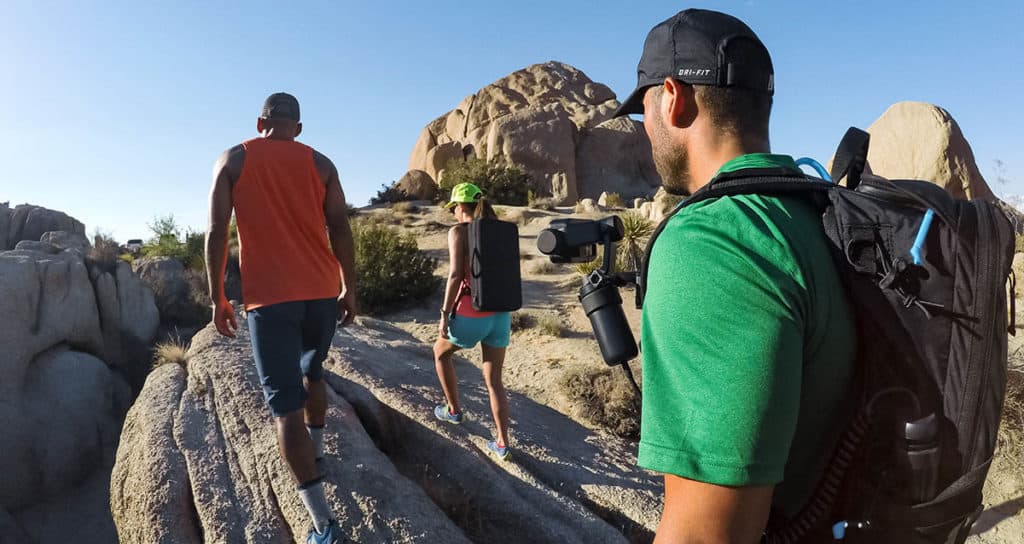
Interestingly, the Karma Grip markets itself as a wearable gimbal, meaning you can have it attached to a chest mount, shoulder strap or say, a bike’s handlebars. However, in practice I found it to be a less than ideal wearable gimbal setup.
The problem is the grip itself contains the battery for the gimbal. So while you can separate the gimbal from its grip, it won’t work. Therefore, if you want to mount it anywhere, you have to mount the entire Karma Grip!
True wearable gimbals like the Feiyu WG2X are much more compact and don’t house their battery in a grip. They are far better suited to mounting on your body or elsewhere.
GoPro do realize this as a problem and suggest using the GoPro Karma Grip Extension Cable which means you don’t have to keep the long and bulky grip attached to the gimbal stabilizer. This, however, makes body mounting setups incredibly expensive.
GoPro Karma Grip mounted to chest using GoPro Karma Grip Extension Cable (purchased separately)
Battery Performance
Battery performance is easily the number one issue raised by people when it comes to the Karma Grip. Unlike newer and cheaper gimbals which can last for over 10 hours, the Karma Grip will only last around 2 hours when shooting at 4K.
One of the reasons for its poor battery life is that the GoPro Karma Grip will always be charging your GoPro when it’s attached. So it’s not only powering the gimbal motors, but charging your GoPro battery which consumes a lot of power when recording at 4K.
Furthermore, charging it with a standard charger takes 6 hours. You can buy the expensive GoPro Supercharger to cut that down to a much more reasonable 2 hours. But your best bet is probably just to buy a 3V, 5A fast charger which will be just as fast and much cheaper.
In any case, battery life is definitely an issue with the Karma Grip. A lot of users don’t see it as a big issue and to be quite honest 2 hours is enough in most cases. You can always buy a powerbank if you are a heavy user. However, compared to the battery life of other GoPro gimbals out there, it is definitely disappointing.
Verdict and Rating
The GoPro Karma Grip is still one of the best GoPro gimbals around. From a pure image stabilization standpoint, the numerous firmware updates have made it the best on the market. It also feels great, and quite possibly the best I’ve ever used, when filming. It’s ergonomics are on point and native integration with the GoPro make for a seamless user experience.
However, it costs a lot. Its battery life is significantly shorter than its competition. Although it technically can act as a wearable gimbal, using it as a wearable gimbal is a cumbersome process. As a result, it’s not perfect.
Pros
Excellent Stabilization Performance
Part of the GoPro Ecosystem
Fantastic ergonomics
Cons
Price
Battery Life
Rating: 4/5
The GoPro Karma Grip is currently one of our favourite GoPro Gimbals.
Sale
GoPro Karma Grip (GoPro Official Accessory)
Capture amazingly smooth shake free video
Compatible with GoPro body mounts
Includes Karma Harness for HERO6 Black/HERO5 Black , HERO7 Black
Karma Harness for HERO4 Black and Silver cameras sold separately
Built in camera controls. Recharge up to 70percentage faster
Smartphone gimbals are going mainstream. You might have attracted some strange looks filming with one a few years ago, but today no one bats an eye. I recently moved to London and these things are everywhere.
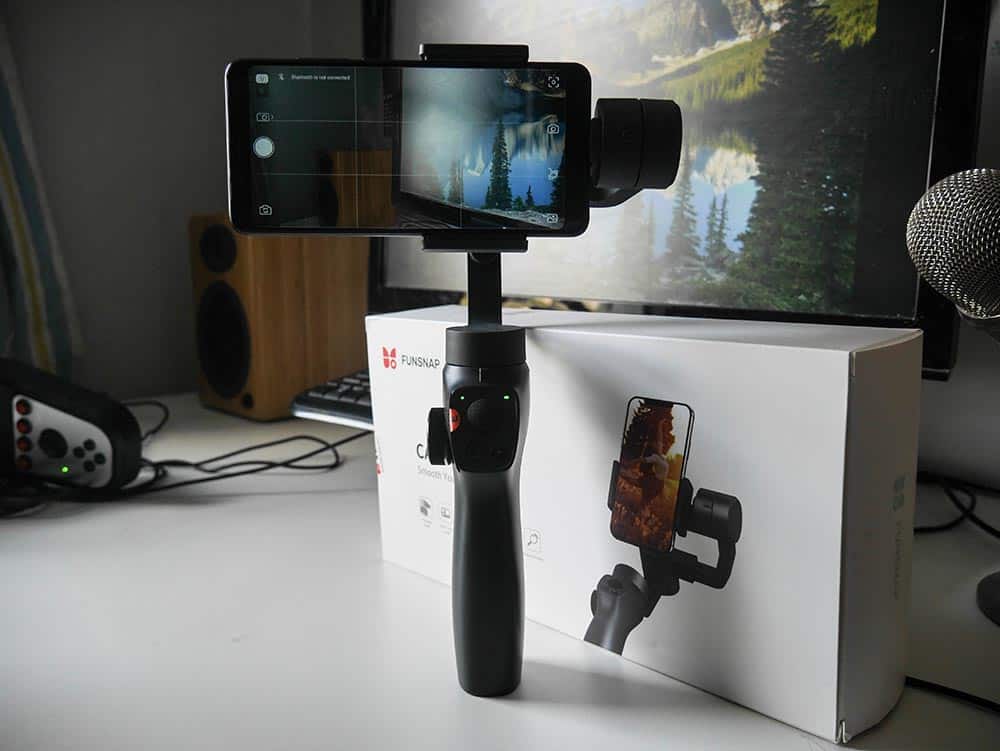
I was given the opportunity to review the Funsnap Capture 2, another gimbal from Funsnap which succeeds the original Capture. This is yet another 3-axis gimbal for your iPhone or Android that eliminates camera shake, but can it differentiate itself within a market that’s already crowded? Let’s take a closer look in this review.
First Impressions
The Funsnap Capture 2 comes packaged in a clean white box. Inside is a black hard styrofoam case which contains the gimbal itself and a Micro USB cable that can be used for charging.
The gimbal’s design is undeniably similar to the DJI Osmo Mobile 2. This certainly isn’t a bad thing given that has some of the best ergonomics for a smartphone gimbal. Perhaps surprisingly, the Funsnap Capture 2’s build quality is just as good. It feels robust in the hands and belies its lower price tag.
There are, however, differences compared to the Osmo Mobile 2. The Funsnap Capture 2 features a zoom wheel on the left instead of a zoom slider, and adds a trigger button to the back of the grip.
For myself, these are big improvements. A wheel is far more consistent for zooming than adjusting a tiny slider. Meanwhile the trigger, which can serve two purposes, is something that becomes handy while recording and feels very natural to use.
The other major difference is the Capture 2’s lack of balance adjustment and holder knobs. Instead of adjusting the arm’s length by turning a balance adjustment knob to unloosen the arm, you adjust the length by simply pulling or pushing the arm. As you push/pull, the arm ‘clicks’ into position in discrete steps.
This has the advantage of being less fiddly, but the balance adjustments can’t be fine tuned as much. For example, I could perfectly balance an iPhone X, but couldn’t perfectly balance a Xiaomi Redmi Note 5. Note that this isn’t a big issue as the gimbal will automatically level the horizon when you turn it on, but it will cause very slightly higher battery drain.
Compatibility
As with most smartphone gimbals, the Funsnap Capture 2 uses a spring-loaded adjustable clamp. The clamp can fit phones that are 55-90mm wide. That means it can house pretty much any phone/phablet you can think of. It can fit house a GoPro or similar action camera, although I did not try it myself.
But the clamp is rarely an issue when it comes to gimbal and phone compatibility. The much more common problem is the gimbal’s motors lacking the power to balance heavier phones such as the iPhone 8 Plus, iPhone XS Max or Samsung Galaxy Note 9.
With a maximum supported payload of 250g, the Capture 2 manages beats out the likes of the Osmo Mobile 2 (240g) and Zhiyun Smooth 4 (210g).
Testing it with the iPhone X and Xiaomi Redmi Note 5, I was impressed that the motors could cope in horizontal and vertical orientations. Maintaining balance when the phone is mounted vertically is often a problem, but the Capture 2 had no such problems.
Shooting Modes
The Funsnap Capture 2 features 3 basic shooting modes, which can be cycled through by tapping the Mode button. The shooting mode that is being used is indicated by the color of the Mode LED.
All-Following (Green): The default mode, the gimbal locks the roll axis while following movements in the pan and tilt axes.
Locked (Red): All axes are locked, meaning the camera lens will stay pointed at the same target.
Pan-following (Blue): The pitch (up and down) and roll axes are locked, meaning the gimbal keeps the horizon set but will follow any left/right panning.
The behavior of the trigger button can be set by the user. It can either temporarily lock the gimbal (regardless of shooting mode) or activate ‘Phone Go’ mode, which boosts the motor speed and makes sure the gimbal follows your movements without lag. The Phone Go mode is particularly useful when you need to temporarily track a fast moving object but want to otherwise maintain a slow/medium panning and tilting speed.
Performance
Most iPhone and Android gimbals do a pretty good job when it comes to stabilization these days. The Funsnap Capture 2 is no different. Videos came out silky smooth with no noticeable camera shake, micro jitters or sudden motor spasms. Motor noise is present but quiet and doesn’t get picked up by the phone’s microphone.
The Capture 2 delivers a seamless and pleasant filming experience. It combines the Osmo Mobile 2’s ergonomics with the Zhiyun Smooth 4’s zoom wheel and rear trigger, which means you get the best of both worlds. Speaking of the zoom wheel, zooming in and out is smooth and doesn’t have the incremental movements that some other budget gimbals have.
The Capture 2 app worked without a hitch on Android and iOS. The software is basic, but lets you adjust all the settings you might want to change and has some fancier features like 320-degree panoramas and motion timelapses.
Battery Life
The Funsnap Capture 2 reportedly has a 8-12 hours battery life. I haven’t tested it for an extended period of time but I’ve used it on and off for a couple of days and haven’t needed to charge it.
Verdict
Overall I was very impressed by the Funsnap Capture 2. It doesn’t bring anything new to the table, but it offers solid stabilization performance as well as great build quality with nice and chunky gimbal arms that don’t look like they’re ready to snap off. It also combines the features I liked from various other gimbals, namely a comfortable grip, smooth zoom wheel and rear trigger. For the price, you’ll be hard pressed to find a better gimbal.
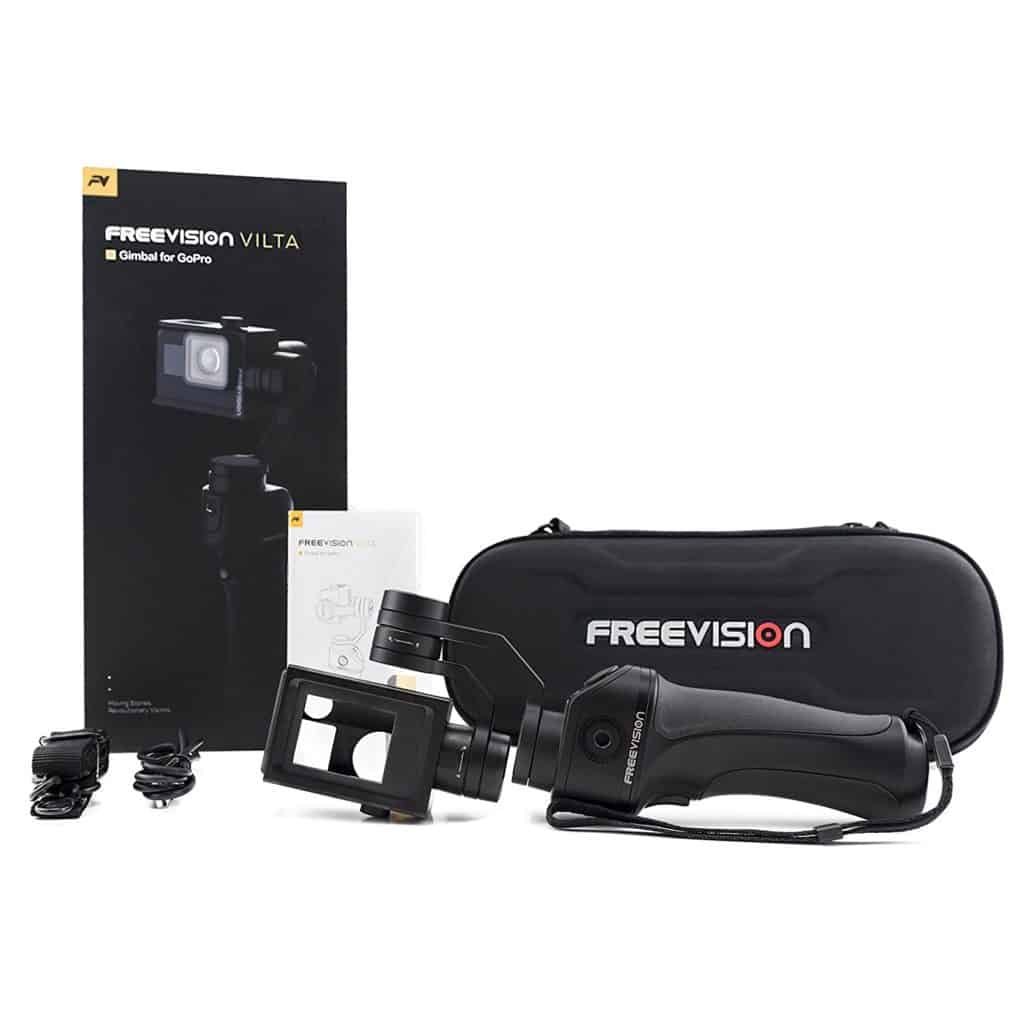
Freevision impressed me with their Vilta-M gimbal for smartphones. It featured premium build quality at a very reasonable price point. The Freevison Vilta-G is a 3-axis motorized gimbal for GoPro/action camera gimbal and I’ve had the chance to test it out.
First Impressions
The Freevision Vilta-G comes packed in a semi-hard shell case which also includes a micro-USB charging cable and shoulder strap.
Like the Vilta-M, the Vilta-G feels well-built. The front and back rubber grips that line the handle make it very comfortable to hold in the hands.
As with pretty much any other GoPro gimbal, the Vilta-G features a metal, universal quarter-inch thread needle to connect it to various poles or tripods. A nice surprise is the addition of a rosette mount on the side of the gimbal that provides compatibility with even more accessories like custom DJI Osmo Mobile accessories.
The mounting procedure is very simple and straightforward. The Vilta-G’s frame housing is cut to fit the GoPro HERO5/6/7, making it a simple case of sliding the GoPro in. The included GoPro HERO3/4 frame housing needs to be used if you’re using an older GoPro model.
Using The Vilta-G As A Wearable Gimbal
One of the Vilta-G’s unique features is that it can be used as either handheld gimbal or a wearable gimbal. This is achieved by simply pressing the ‘PUSH’ button which releases the gimbal from its handgrip, leaving a wearable gimbal that is compatible with the GoPro mounting ecosystem.
This isn’t the first GoPro gimbal to do this, since the Removu S1 and (with some fiddling) GoPro Karma Grip can also be used in two different ways.
The Vilta-G is perhaps a superior 2-in-1 setup to the GoPro Karma Grip, but doesn’t execute things quite as well as the Removu S1. Firstly, detaching the handgrip on the Vilta-G leaves you with just a 350mAh battery which doesn’t last very long. Secondly, the form factor of the gimbal in its wearable form is a tall and not as well-suited to mounting as ‘true’ wearable gimbals like the Feiyu WG2X wearable gimbal.
With all that said, I can’t deny that the Vilta-G has a serious trick up its sleeve by being able to function as both a handheld and wearable gimbal. If you wish to record video with your GoPro both in your hands and worn, the Vilta-G is one of the very few options with that capability.
Controls
The Vilta-G is fairly simple to control. Aside from the power button, the main button you’ll be using is the trigger button at the rear of the grip which cycles through gimbal shooting modes.
The following mode locks the GoPro’s roll axis, meaning it will follow your movements in the pan and tilt axis while making sure the footage is smoothed out. Meanwhile, the locked mode will lock the GoPro in its current orientation, meaning it will counteract movements in all axes and stay locked on the target.
While you’ll typically be pointing the camera around using your hand, the Vilta-G features a joystick that can electronically adjust the pan and tilt. This is useful if you wish to make super-steady pan and tilt motions and don’t have much faith in your own hands to keep things steady.
The Vilta-G has a 360-degree range of motion in the pan axis and a tilt axis of -45° to 100°. This makes it superior to much of its competition in this respect, beating out the likes of the GoPro Karma Grip and Removu S1.
Performance
Stabilization performance is definitely one of the Freevision Vilta-G’s strong points. Comparing footage with other highly-rated gimbals like the GoPro Karma Grip and Feiyu G6, there is almost no difference.
Only when I compared footage to the GoPro Karma Grip when zoomed in at 20x could I notice a significant difference between the two. The GoPro Karma Grip is still the king of stabilization performance, but the Vilta-G is definitely one of the best performers out there among third-party gimbals.
Freevision App
While the GoPro has its companion smartphone app, to change various settings on the Vilta-G or control it remotely, you’ll want to download the Freevision gimbal app.
As with many other gimbal apps, the Freevision app is quite disappointing, with poor translations from Chinese and a poor user experience. I found it quite difficult to pair the app with the GoPro, but it magically started working after a few failed attempts.
Since Freevision gimbals aren’t as popular as gimbals from bigger third-party gimbal manufacturers like EVO or Feiyu, I wouldn’t count on the smartphone app seeing any considerable improvement.
Verdict
The Freevision Vilta-G is a great GoPro gimbal that performs well in every aspect. The fact that it has the versatility to be used as a wearable as well as handheld gimbal is the icing on the cake.
Unfortunately, it’s difficult to see which target Freevision are targeting given the Vilta-G’s price.
It doesn’t offer the same value proposition as the cheaper Feiyu G6 and is priced much closer to GoPro’s very own Karma Grip. While the Vilta-G does have superior battery life and is simpler to use as a wearable gimbal, the Karma Grip offers superior support, is part of the official GoPro ecosystem and has superior stabilization performance.
The Freevision Vilta-M had a big price cut, and if the Vilta-G is priced comparably to the Feiyu G6 I can confidently recommend the Vilta-G as a solid purchase. However, at its current price of $239.99, it feels a little overpriced.
Rating: 3.5/5
Freevision Vilta-G GoPro Gimbal
SUPERIOR STABILITY:VILTA has the most advanced motor and servo control algorithm. Extremely fast response speed and high control precision, it achieves an image stability higher than competitors
Handheld Gimbal changes to a wearable gimbal with a quick release button. Wearable gimbal is compatible with GoPro mounts.
No more complicated calibration procedures, VILTA applies its own patented adaptive sensor algorithm and intelligent calibration system
NOISE REDUCTION: The motor response will be accompanied by some, but minimal, noise that might be picked up by your camera.
CHARGING ADAPTER FOR GO PRO: The power charging adapter can extend GoPro camera life while in operation. The gimbal base and handle batteries are independent systems.
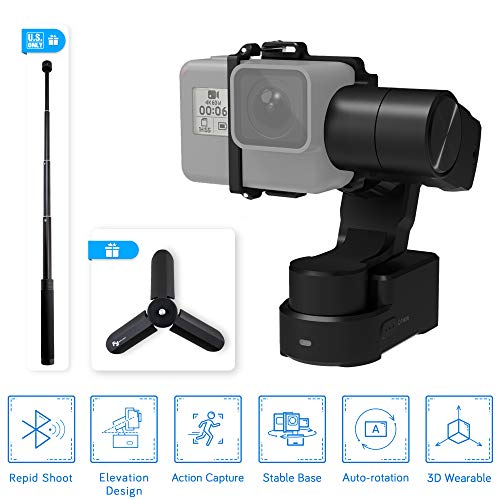
Feiyu Tech have produced many gimbals for the GoPro but the wearable WG2 gimbal is no doubt their most popular. Just over a year following its release, Feiyu have updated the WG2 and come out with the WG2X.
Differences Between The WG2 and WG2X
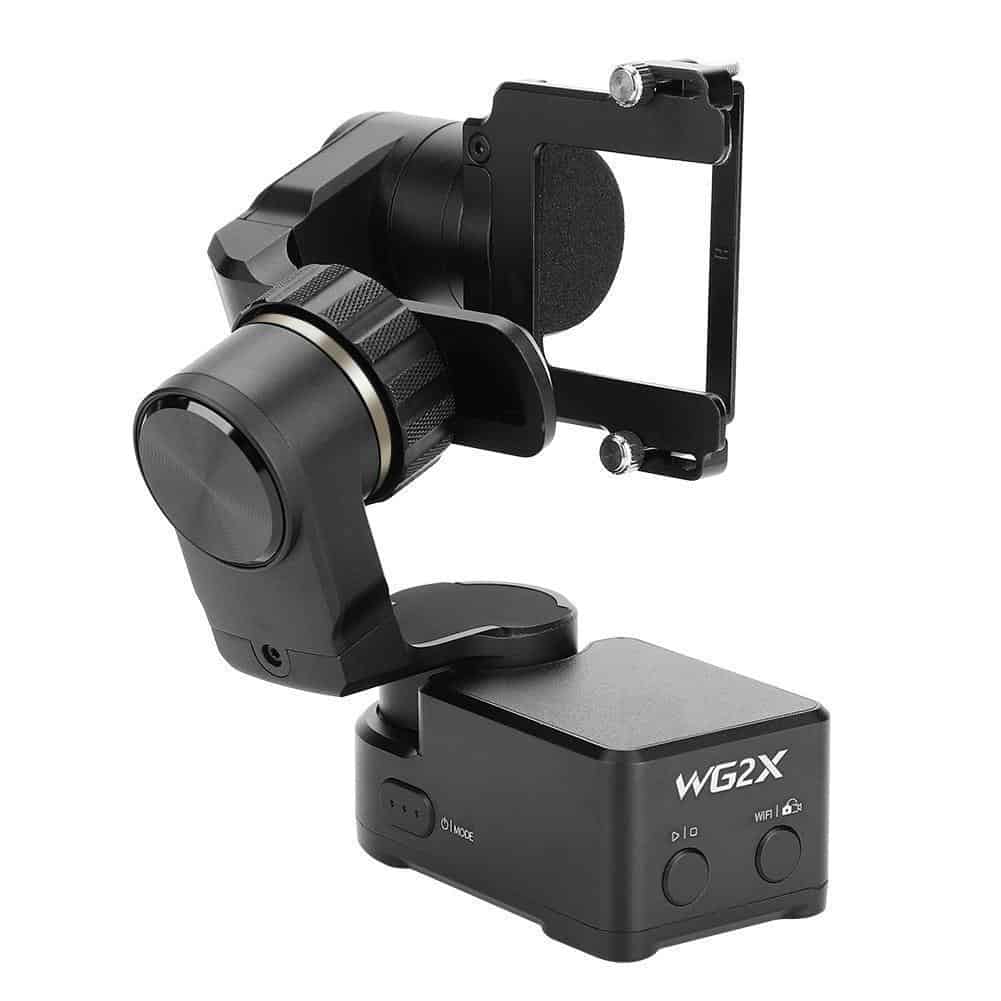
Unlike the WG2 which was IP67 waterproof, the WG2X takes a step backwards and is only splashproof. However, the WG2X is improved in other areas. It has an angled arm that makes it possible to use your GoPro’s touchscreen unobstructed and leaves the GoPro better placed when mounted on your chest. It is also lighter, features improved stabilization and adds a shutter and mode button.
Compatibility
The Feiyu WG2X supports the GoPro HERO7 (all models), HERO6, HERO5, HERO4 as well as the HERO Session via the included Session mount adaptor. It also supports most similar sized action cameras (with a max payload of 130g), including popular ones like the Yi 4K/4K+, Sony RXO and SJCam.
With its universal ¼ inch thread mounting hole, it is easily worn with chest harnesses, shoulder straps and helmet mounts. It can also be attached to desktop tripods, selfie sticks and handlebars.
Design
The WG2X’s design is similar to the WG2, with the exception of an angled arm. The angled arm is definitely a response to complaints about the arm obstructing the GoPro’s screen on the WG2.
Its three motors feature unrestricted 360° range of motion in the pan and tilt axes, beating much of its competition. For comparison, the EVO SS (Zhiyun Rider-M) only features a 320° pan and tilt angle.
While the WG2 had an aluminium body, the WG2X has an aluminium and ABS construction that sheds 27g from its predecessors weight.
The shutter button and mode button together make it much easier to perform the basic actions necessary to record video. It definitely beats having to reach for your smartphone or fiddle with the GoPro itself.
Shooting Modes
The Feiyu WG2X features three shooting modes, which can be changed by either pressing the mode button or remotely using the Feiyu ON app (available for iOS and Android). Pan follow mode: In this mode, the gimbal will keep the horizon level, but follow pan (left and right) movements. This is probably the most useful mode for action sports, although an argument can be made for using the following mode. Following mode: The gimbal will follow movements in the pan and tilt axes while keeping the footage stable. Locked mode: The gimbal will lock the orientation of your action camera in all three axes. This means it stays focused on its target.
A bright LED on the WG2X makes it easy to quickly determine which shooting mode you are currently in.
Performance
The WG2X performed very well in stabilization testing. It is ahead of both the WG2 and EVO SS, with a higher responsiveness when all three were tested using their maximum follow speeds.
You can see a comparison video with the WG2 here:
As for battery performance, the WG2X’s 1500mAh battery was able to last for around 2.5 hours.
Verdict
Overall the WG2X is a straightforward upgrade to the WG2, which was already one of the best wearable gimbals on the market. It is a shame to see the IP67 waterproof body to be replaced by a splashproof one, but the waterproof body of the WG2 didn’t hold up well in watersports anyway.
The arm redesign doesn’t warrant replacing your old WG2 if you already own one. However, first time buyers will definitely want to get the WG2X over the WG2 unless the WG2 is heavily discounted.
With superior stabilization, a decent price point and almost no notable flaws, the WG2X is in my opinion the best wearable gimbal for GoPros right now.
Rating: 4/5
The Feiyu WG2X is currently our favorite wearable GoPro gimbal. See the full list of the best GoPro gimbals here.
Sale
FeiyuTech Feiyu WG2X Splash-Proof 3-Axis Wearable Gimbal Stabilizer with 360° Pan and Tilt Rotation, Action Camera Gimbal Compatible with GoPro Hero 7/6 / 5/4 / Session and Similar Size Cameras, comes